Let’s consider 3 main scenarios: creating a task in automated dialing upon an event in B24, creating a lead in B24 upon an event in Oki-Toki, changing the status of a lead following an event in Oki-Toki.
Important! The settings use webhooks in Oki-Toki, as well as Robots and Triggers in B24, which are not available in all tariffs.
Case №1. How to create a task in an automated dialing system when events occur in B24
Determine which sales funnel and from what status you are drawing tasks from, then:
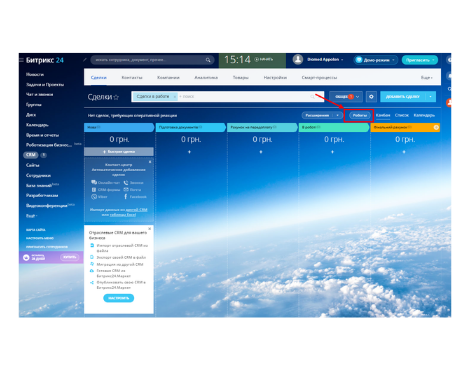
- Open the Robots settings in B24 and select the required status,
- Go to the setting of the Robot – by clicking “Add”
- From the dropdown list select “Custom robots”. Choose the Webhook option.
- That’s all. (*Unfortunately, there is no official documentation for this.)
In the webhook settings, specify the conditions triggered, it will send data to Oki-Toki. By default, the sending occurs when a lead/deal transitions or is created in this status. With additional conditions, you can transmit only certain leads from B24 (for example, only those where there is a specific responsible agent).
Then construct an API request to add a task to the automated calling. There are examples of requests in the API documentation for Oki-Toki. The simplest API request should contain an Oki-Toki user’s API key and a phone number. Of course, if necessary, you can also transmit other additional data with the number. For example: order number, client name, the amount of debt, etc.
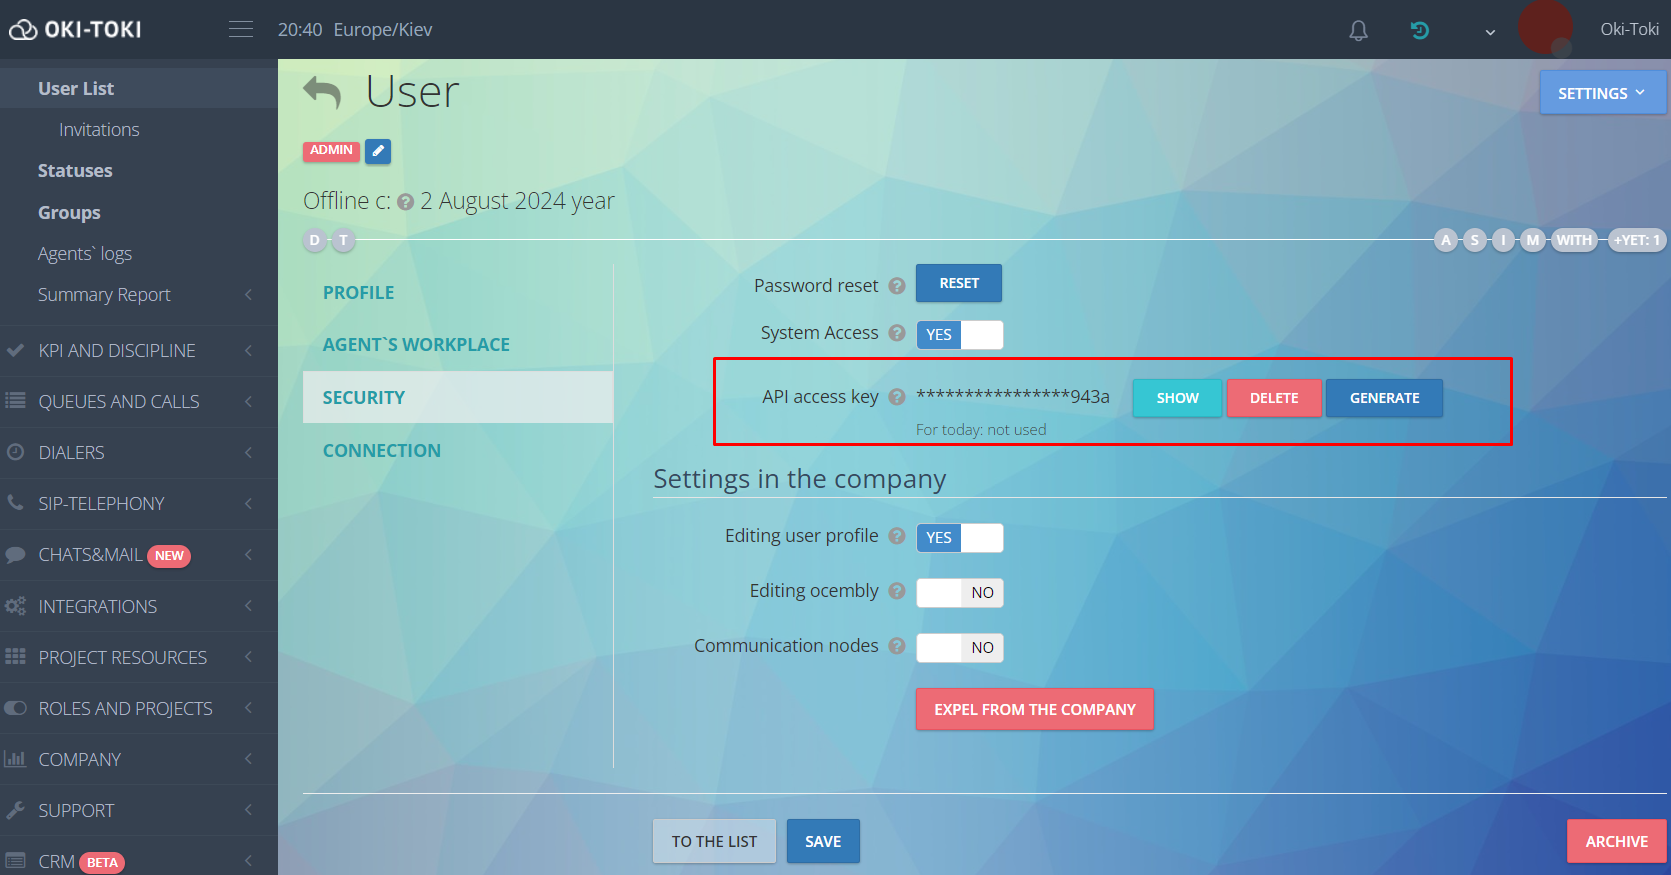
api_token – created in the settings of the user profile of Oki-Toki.
dialer_id – the number of the automated calling to which the task needs to be added. We take the value here:
The phone number is passed from B24. It can be obtained from various lead fields, so you need to specify the name of the B24 variable with the phone number. It’s easier than you might think. Detailed instructions follow:
- Take the request you prepared earlier (as in the example above, but with the specified API token and autodial number).
- Open the B24 webhook settings and copy it to the “Handler” field. Place the cursor where the variable needs to be inserted (in our case, after the “=” sign near the phones variable), click on the three dots (…).
- In the menu (…) choose the field with the phone number and B24 will insert the variable of this field.
- Save the settings!
- Done, your API request is compiled and ready to be sent.
How can you check if it works? Create or move a lead/deal, and if the request is compiled correctly – a task will be created in the autodial.
Case No. 2. How to create a lead in B24 during events in Oki-Toki.
What types of events are in Oki-Toki and what do they represent?
- Call Function(s) – Events that occur during calls (relay messages, queue, agent, redirection, conference, etc.),
- User status – Events that occur when the user’s status changes (occupied, ready, away).
- Incoming SMS – the event of an incoming SMS when GSM-gateways are used in Oki-Toki (available only for UA companies)).
- Task status (dialer) – the result of the task processing in dialer (success, failure, cancellation).
- List modification – events triggered by actions with lists (for example: adding, deleting).
- Disciplinary report – events arising from disciplinary violations of the agent/supervisor (the agent did not answer the call, the agent ended the call).
- AmoCRM – Used for processing events from AmoCRM.
How to create a webhook for an event in Oki-Toki
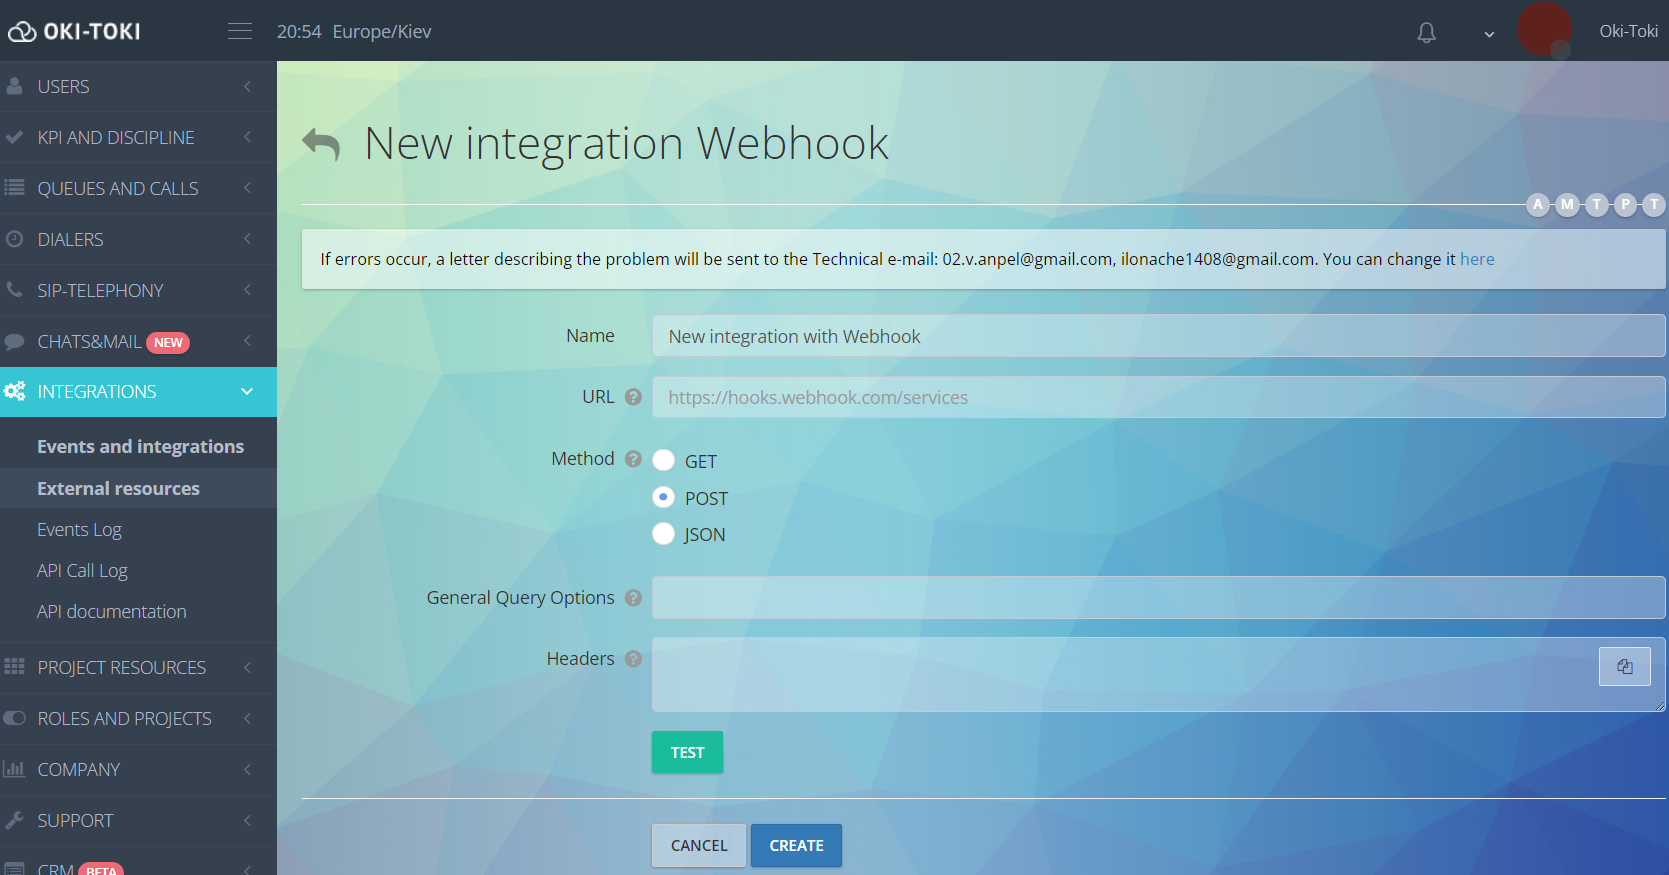
First create an external integration:
1. Go to section Integrations – external resources – select Webhook.

2. Indicate the name of your integration, and in the URL line insert the link to your B24 and the “Lead Creation” method.
Example: https://subdomain/crm/configs/import/lead.php, (where subdomain – is the address of your cabinet in B24). You can find examples with methods in B24 API documentation. The configured webhook of the external integration looks like this:

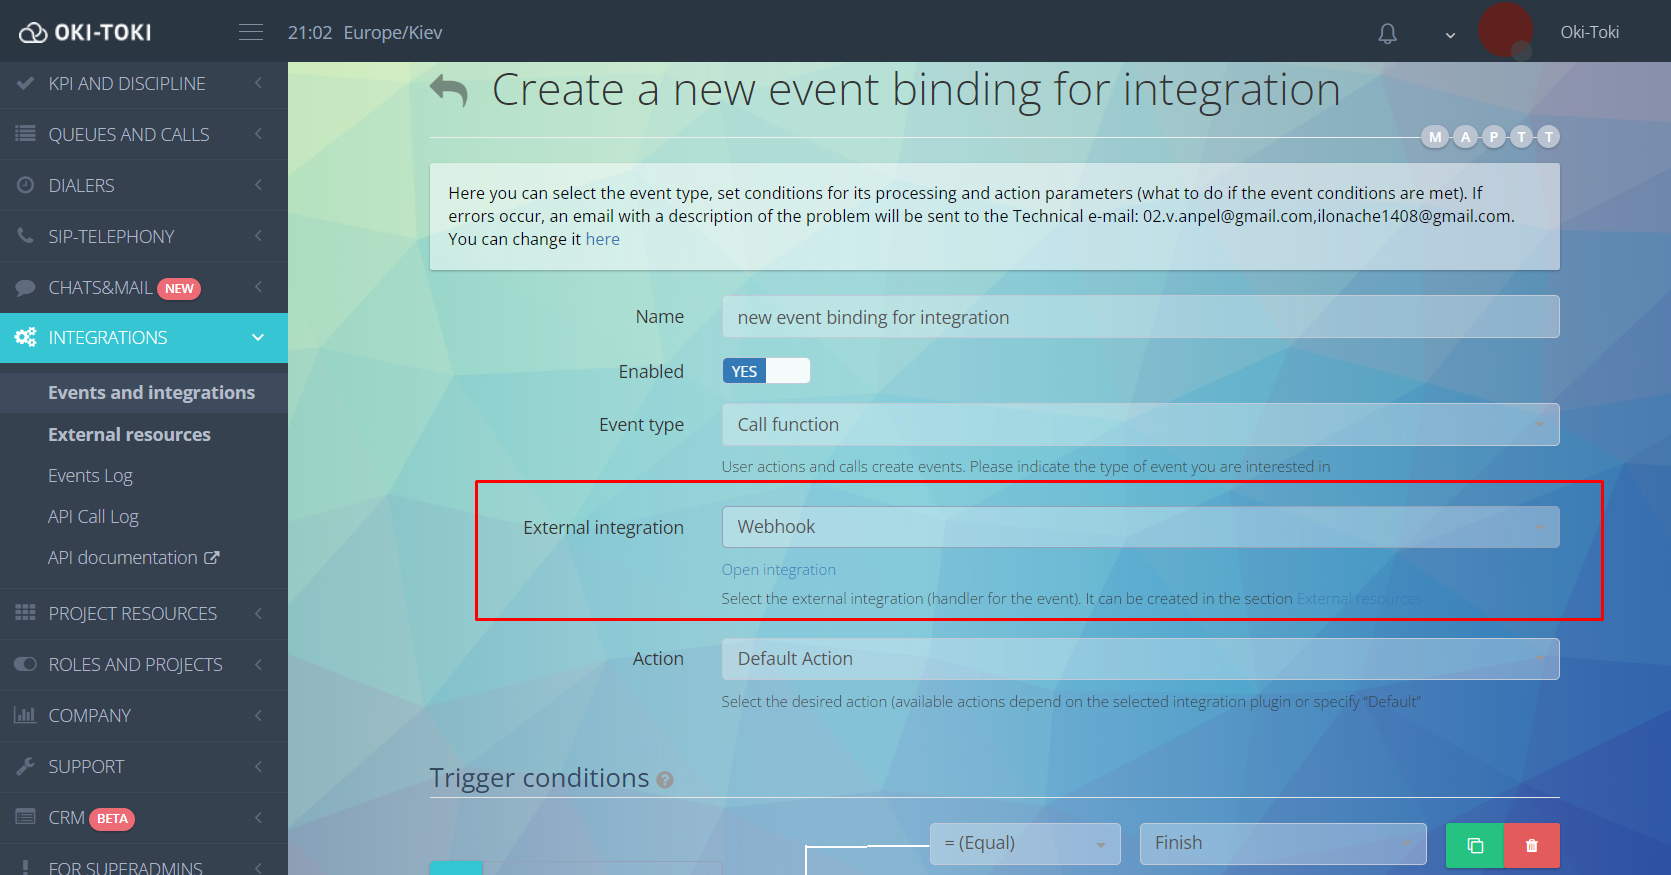
Next, in the “Integrations – Events and integrations” section, create a webhook for the event:
- Create a new event binding to integration (webhook) and name it;
- Choose the event type (the available event conditions will depend on this);
- Specify the webhook integration you made earlier;
- Action on the event – leave the default value, or specify what needs to be done.
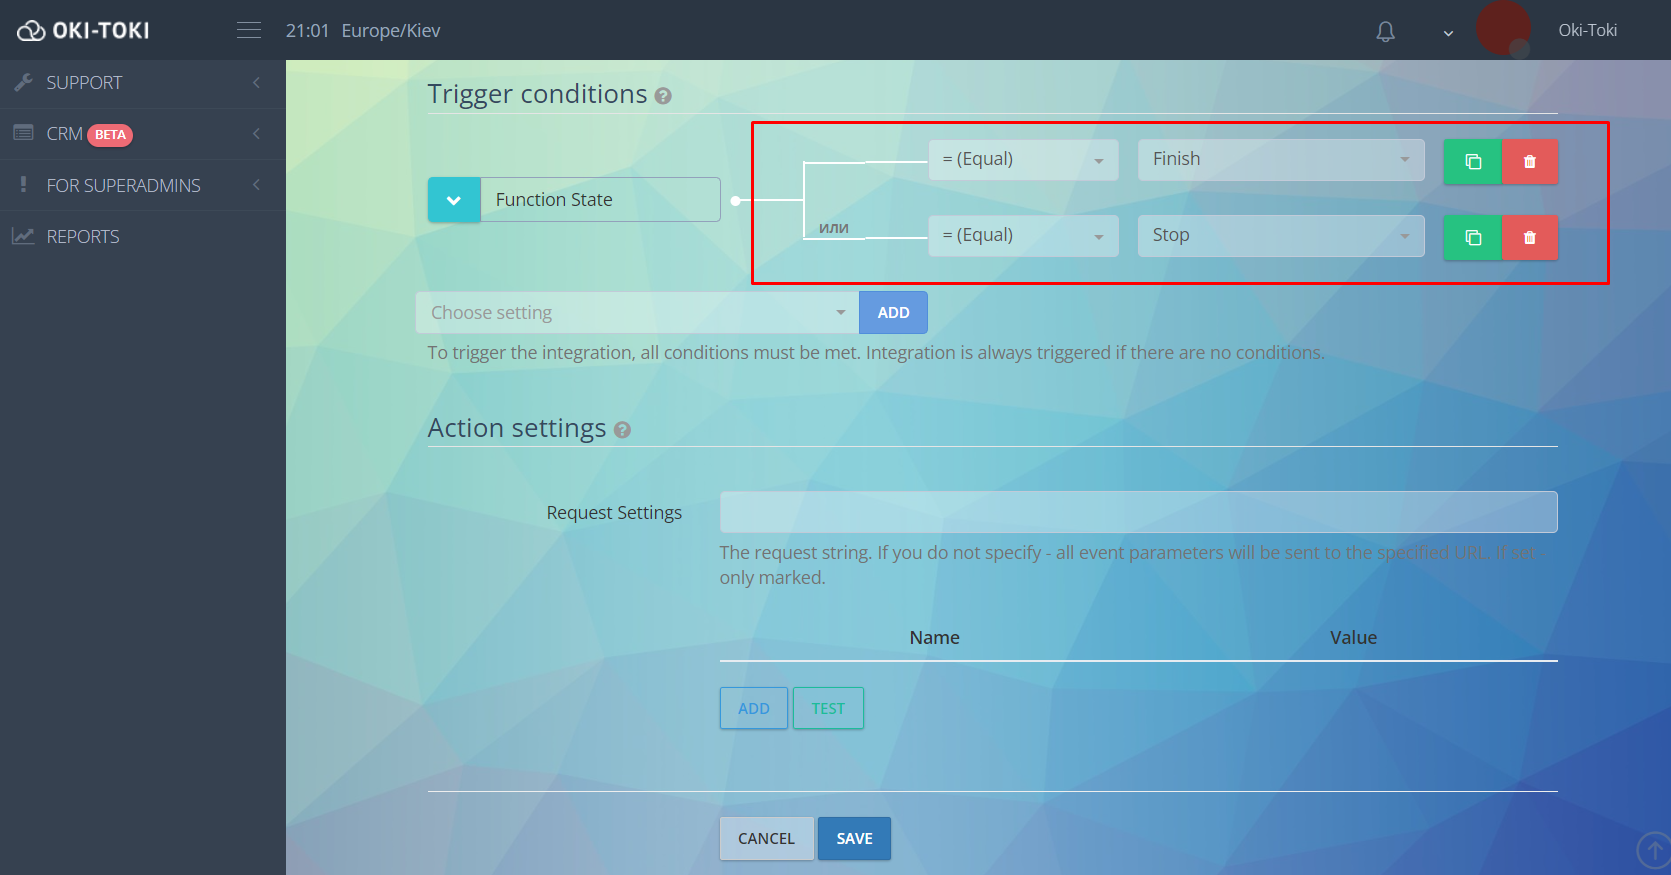
Extensive Example of event parameter input. Depending on the event type, diverse triggering conditions will be available. You can specify multiple selection conditions as needed.Adding conditions mechanism: select a condition from the list and input its parameters (choose from the available list or fill it in manually).
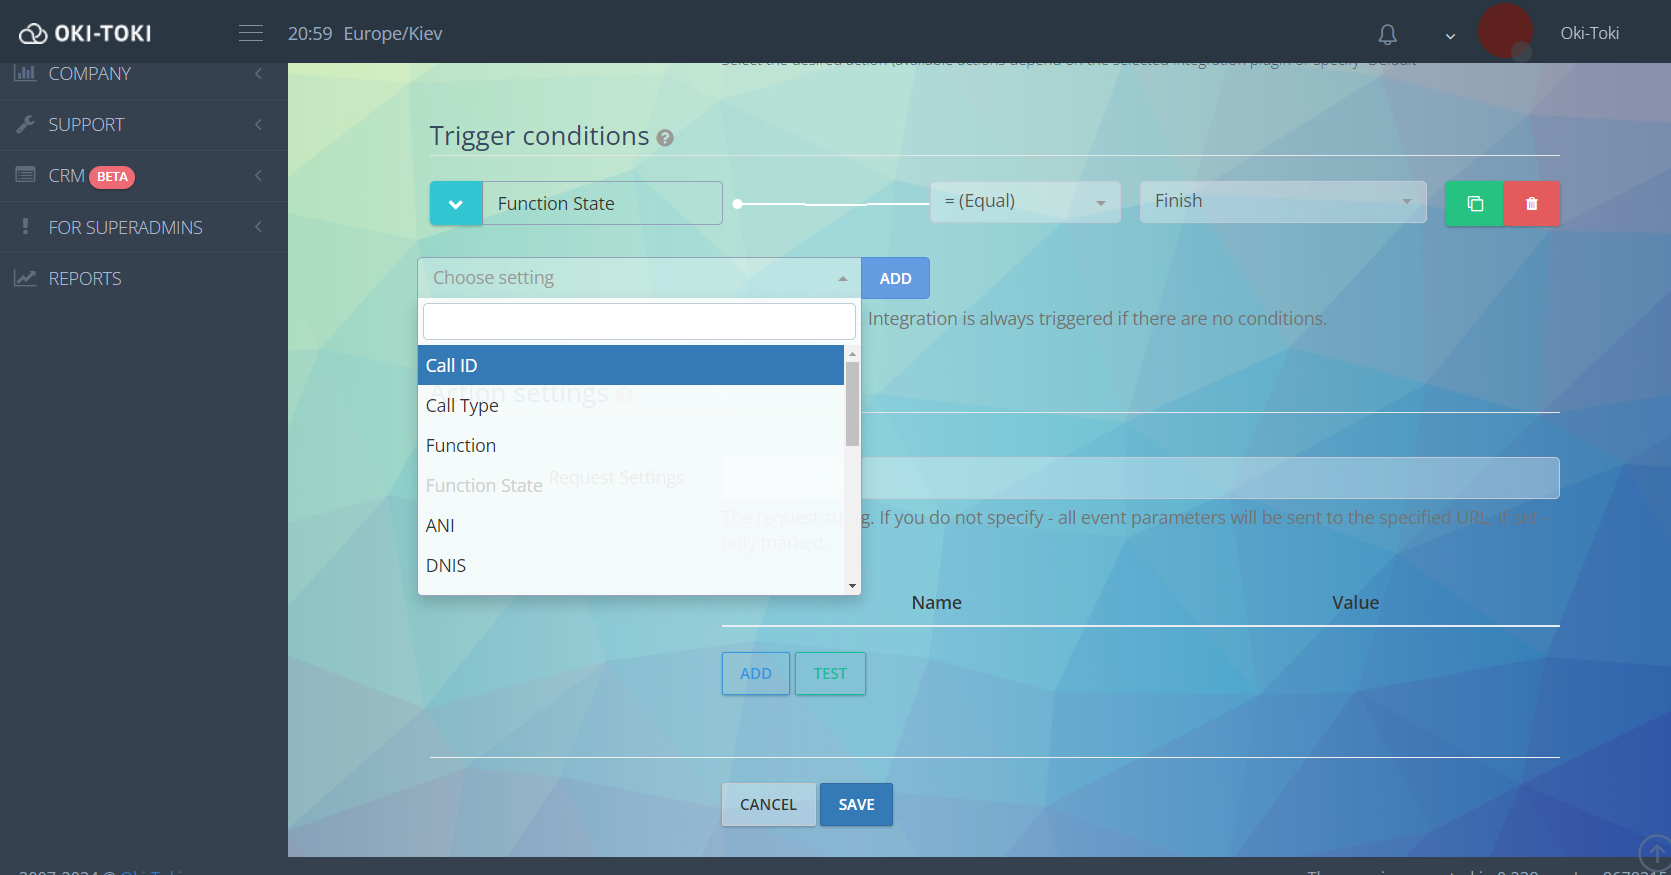
You can specify conditional branching AND/OR:
To create a lead, you need to send a POST request with the “Create Lead” method to B24. Part of the request (with subdomain and method) is already included in the external integration specified in the settings, the rest needs to be specified in the request parameters (where and what to pass). Here you have to use B24 API documentation, it shows how to properly construct a request to CRM, field IDs, method descriptions, etc. Example of a test request/h3>
The test request will only contain the essentials: CRM authorization and the phone number, which will be transferred to the corresponding “Work Phone” field in B24.
- Firstly, in the request parameters, specify the fields for LOGIN and PASSWORD authorization – these are the credentials of the B24 user with the rights to create leads.
- Next, specify the ID of the B24 fields and the data from Oki-Toki (example).
- The request parameters are added with the “Add” button, in the Parameter Name, write the ID of the field from B24 (you can find the list of ID fields in B24 API documentation), and in “Parameter Value” indicate the variable with data from Oki-Toki (what we transfer). You can find the list of Oki-Toki variables here.
Example: the Oki-Toki variable {{dnis}} (answer side B) is transferred to the PHONE_WORK parameter (work phone from B24). In the request, you can transfer data from Oki-Toki to the corresponding fields of B24, knowing the ID of these fields in B24 and Oki-Toki variables.
Case #3. How to change deal status when an event occurs in Oki-Toki
This is the simplest case – you need to generate a trigger in B24, copy it to the external integration and then connect this external integration to the event handler (how to do this – see above)
Step by step setup for your required status:
- In the settings of Robots in B24 in the section “Triggers“, generate a link (example link).
- Be sure to save the settings!
- In Oki-Toki, in the Integrations – External resources section, create a new external integration with a webhook, come up with a suitable name for it and paste the generated trigger link from B24 into the “URL” field.
- Always save the settings!
- Create a new event in Oki-Toki, set the parameters and conditions of the event, be sure to select the external integration created with the trigger from B24.
- In the parameters of this event, nothing needs to be specified (unlike the webhook for creating a lead).
IMPORTANT! This will not work for IN/OUT calls, as the system does not receive the lead identifier from the external CRM. The webhook to change the status in B24 ONLY works if tasks were transferred from B24 to dialer with the indication of the lead ID.
Extra: How to open profiles from CRM B24?
With automatic calls from dialer, there is a useful feature – open a profile/lead card in the external CRM (you can open a lead card from B24 during an dialer).Required conditions
- The agent uses Oki-Toki instead of the operator’s station (with the automatic opening of the profile enabled)
- The task should be added to the auto-dialer from B24 with a mandatory lead\deal ID. Additional data is transferred to the lead when requested in the details parameter (example: details={“ID”:”{{ID}}”})
- In the auto-dialer, where you need to open an external profile, specify the link to the external CRM.
- Link example: https://subdomain.bitrix24.ua/crm/lead/details/{{ID}}/ you take the link to the card from here, just indicate the variable {{ID}} at the end of the link instead of the profile number.
- Insert the link in the main auto-dialer settings here:
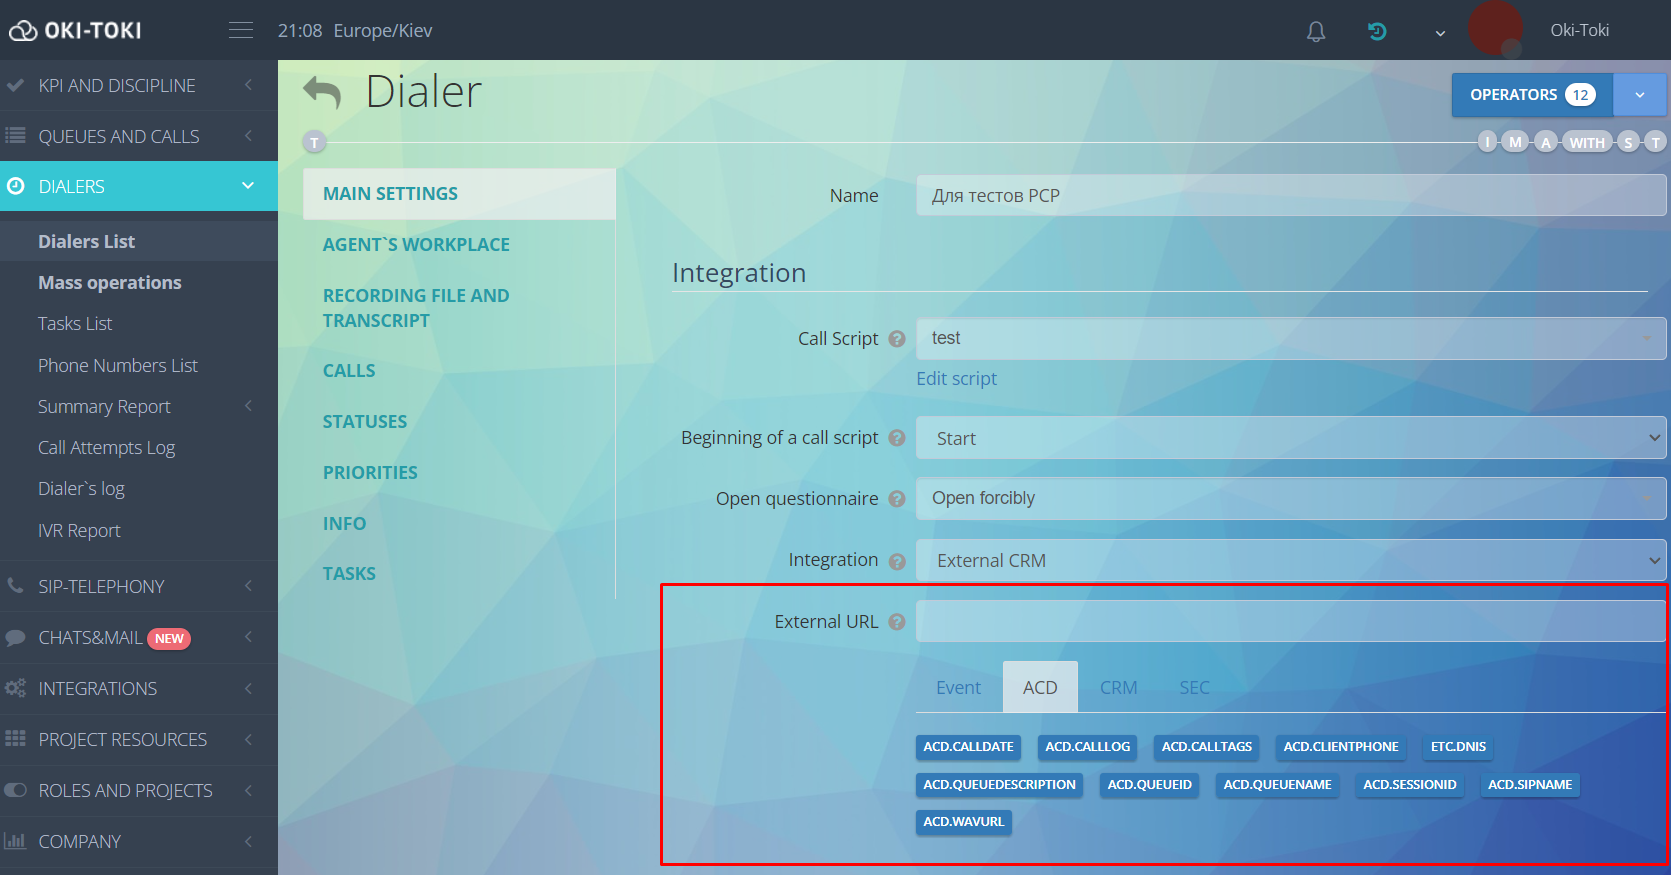
- Don’t forget to save the auto-dialer settings after specifying the external link.
Having problems? Create a ticket in the personal account, and Tech Support will help with answers.