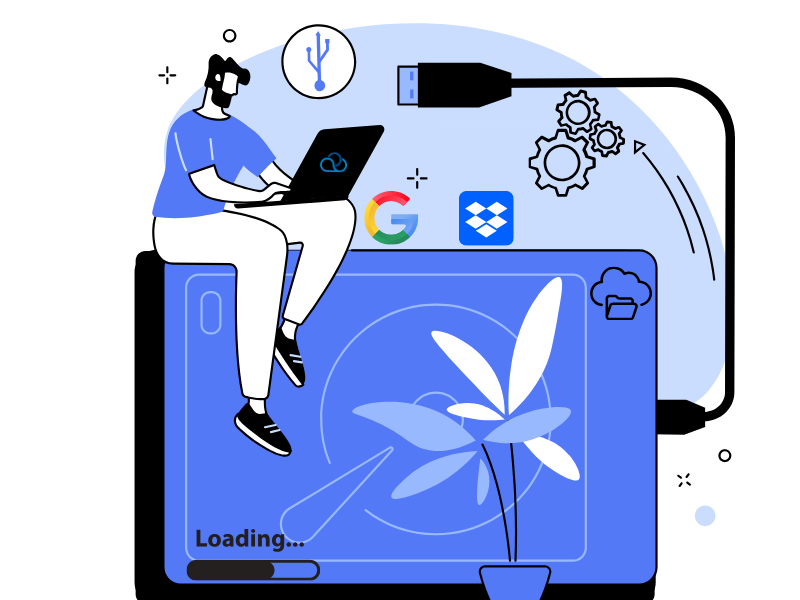
When launching a call center, the immediate question arises: where to store the call records of agents? In Oki-Toki, each company has a basic 10 GB of storage — approximately 1400 hours of conversations, which we commit to storing for half a year. But what if there are much more calls? Or if old records are needed? There are two simple options: expand the storage within Oki-Toki or connect an external one.
-
Why do you need external storage
-
What to choose: Oki-Toki or cloud storage
-
How to connect Google Drive to Oki-Toki
-
How to connect Dropbox
-
How to fix connection errors
Why do you need external storage
Storing call records in the cloud is very convenient. You can access the records from anywhere with internet — from a computer or phone. And there’s no need to keep your own servers to protect the data. Here you can be confident: no conversation will be lost and you can always find the needed record in a couple of clicks.
For many companies, this is not just convenience, but a necessity. In call centers, support services, taxis, and other areas, it’s often required by regulations to store call records. Transferring call records to cloud storage will help efficiently manage these data and not lose any important conversation.
What to choose: Oki-Toki or cloud storage
To understand what’s better for your company, let’s compare external and internal storage.
Advantages of external storage:
- Access: records are outside of Oki-Toki, meaning you have conditional access at all times;
- Flexibility: share calls selectively — for example, with partners, without creating a profile for them in Oki-Toki.
- Cost: cloud storage often costs less, with additional discounts for annual payment.
- Scalability: you don’t need to worry if there will be enough space — you can always increase the storage volume by changing the plan.
- Security: records are protected by high standards, excluding loss and unauthorized access.
Storing records in Oki-Toki also has its advantages:
- Internal storage of Oki-Toki, when it is filled to 100%, replaces the oldest records with new ones, giving priority to recency. Google Drive does not have such priority;
- Additional internal storage, like the basic one, allows listening to dialogs directly from Call Journal. And records moved to the cloud are only available outside the Oki-Toki interface;
- Records in the Call Journal can be found by many parameters and downloaded if necessary. On an external drive, you can search by file name or part of it;
In Oki-Toki, you can independently compile the file name, i.e., indicate data: agent name, Queue/Dialer, call type, phone number, and customer name. A call record file with such a name will be downloaded to the computer and exported to an external disk.
- In the Call Journal of Oki-Toki, it is visible who listened, downloaded, or exported to the cloud;
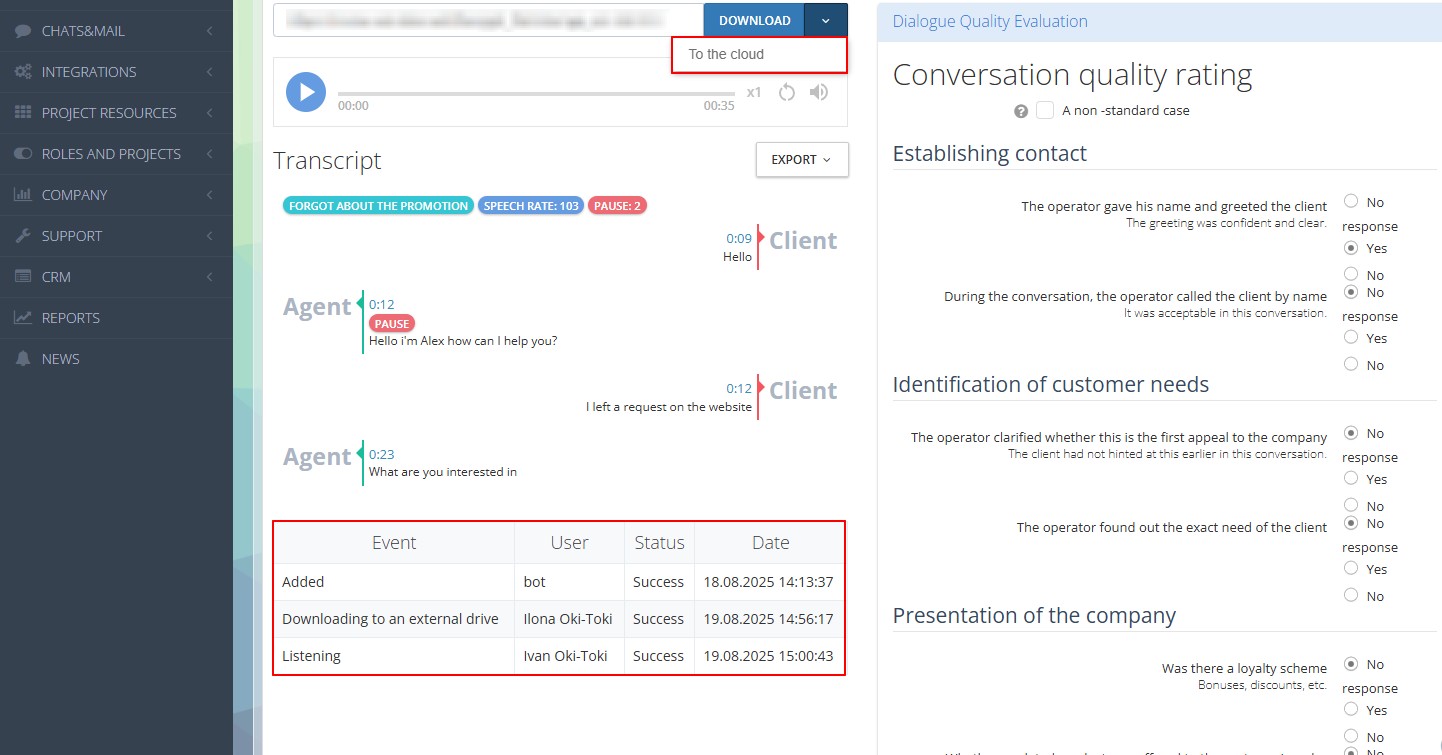
Since by default Google Disk is open only to one user, to listen to a call, another person must be granted access. In Oki-Toki, this is regulated by Roles and Projects;
- A person with access to external storage and editing rights can accidentally or intentionally delete all calls in two clicks, without the possibility of restoring them. In Oki-Toki, records will be stored as long as necessary;
- You can increase the volume of additional internal storage in Oki-Toki in a couple of clicks through Service management. It displays the size of the main storage (10 GB), additional, and how much % is occupied.
Which option to choose is up to you. If you’ve chosen to connect cloud storage, below in the article are two instructions with Setting up Google Drive for call records and Dropbox in Oki-Toki.
How to connect Google Drive to Oki-Toki
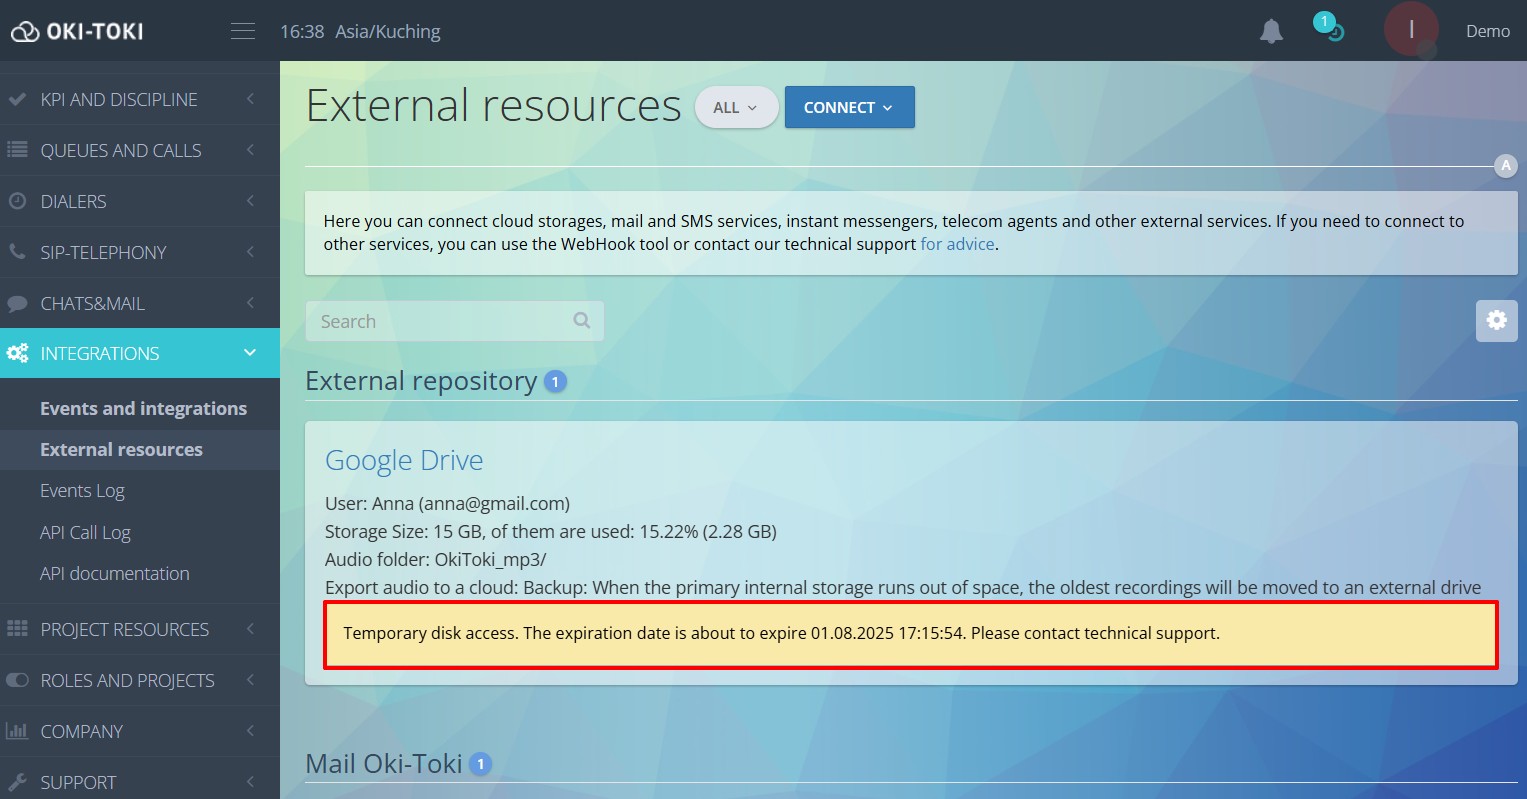
In the section External resources click “Connect” and choose Google Drive from the list. A window will open with the choice of Google account.
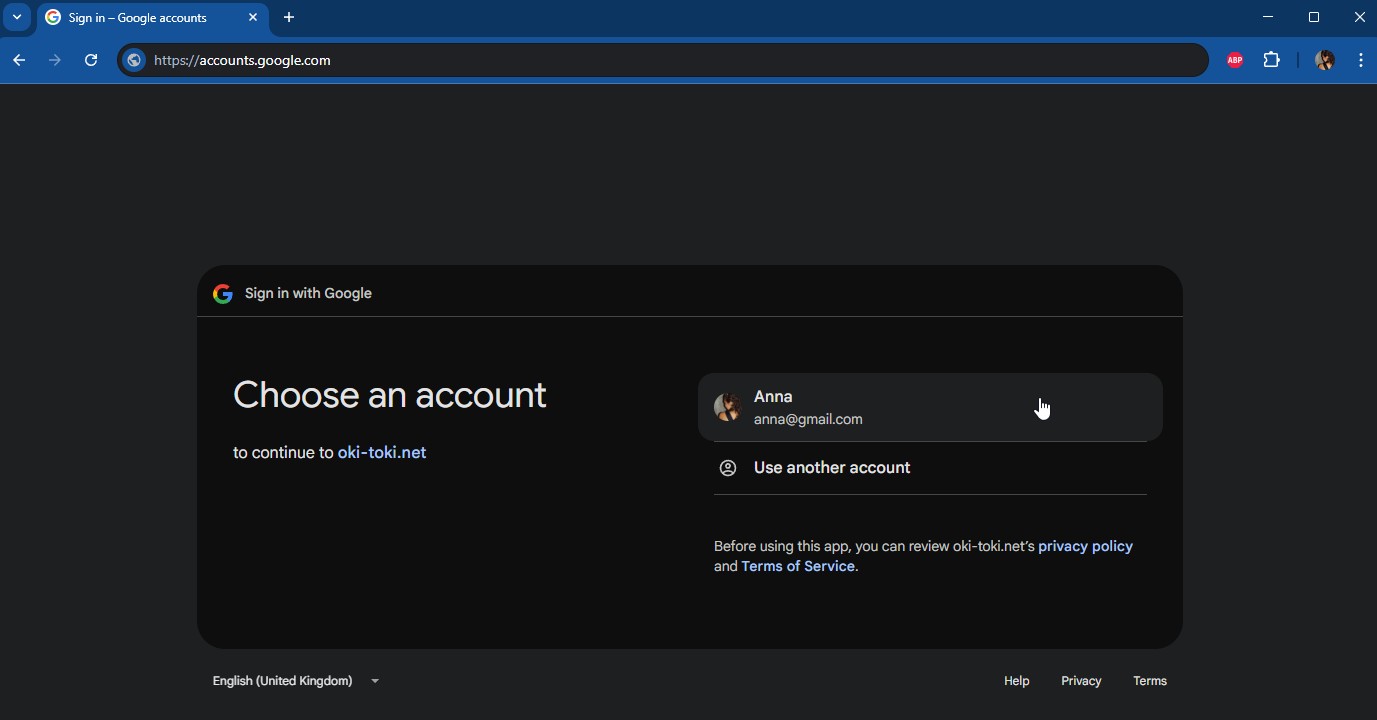
The application will request access, to grant it you need to open additional settings and follow the link. Grant the rights and click “Continue”.
A page with settings will open:
- Folder name – mp3 files will be saved in it during automatic export, as well as when downloading through the “Call Journal” report;
- Export type – enable the toggle if you need automatic export of calls to Google Drive and choose one of three options:
- Backup: old records are moved to external disk when the internal storage is full;
- Mirror: audio is recorded on the main storage, then copied to the cloud;
- External only: audio files are saved only on the external disk.
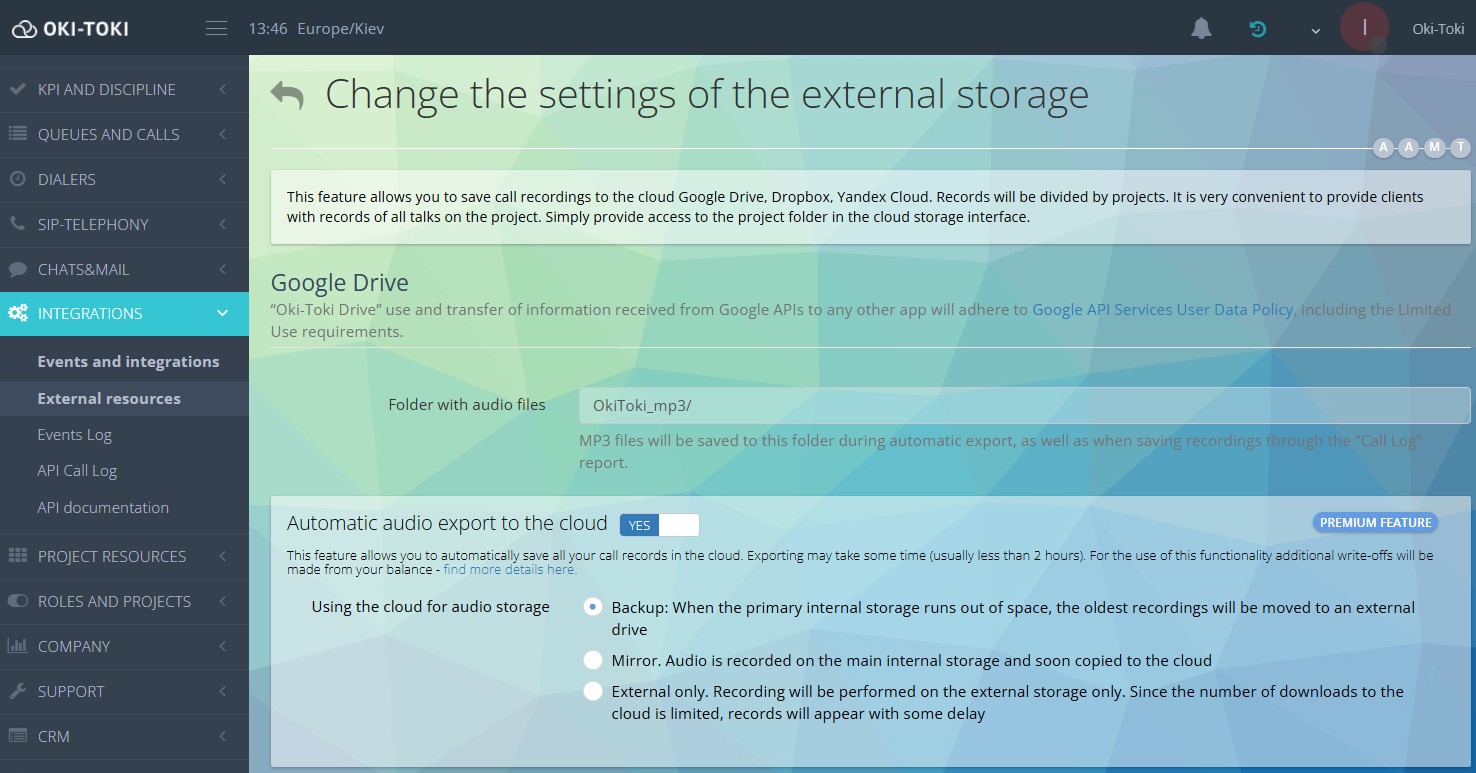
Since the number of uploads to the cloud is limited, records will appear with a slight delay.
After choosing the folder and export options click the “Connect” button – and it’s done. Setting up Google Drive for call records is completed, audio files will be saved in the cloud.
Export of call records to Google Drive can be done manually. In the “Call Journal” compile a report with the desired parameters and press the “Export audio to external disk” button.
How to connect Dropbox
Dropbox — another popular service for data storage. You can configure automatic export of calls to Dropbox from Oki-Toki. The entire setup process is simple and will take just a few minutes.
Connecting Dropbox to Oki-Toki:
In the section External resources click “Connect” and choose Dropbox from the list. You will be redirected to the Dropbox login page. You can sign in via Google account, Apple, by email, or register if you don’t have an account yet.
Then in Oki-Toki fill in the name for the folder where mp3 files will be saved and choose the type of export – “Backup”, “Mirror”, or “External only”. Setting up Dropbox for call records is completed.
Export of call records to Dropbox can be done manually through the “Call Journal” in the top right panel.
How to fix connection errors
Sometimes, when connecting Google Drive or Dropbox to Oki-Toki, errors may occur, but they are always solvable.
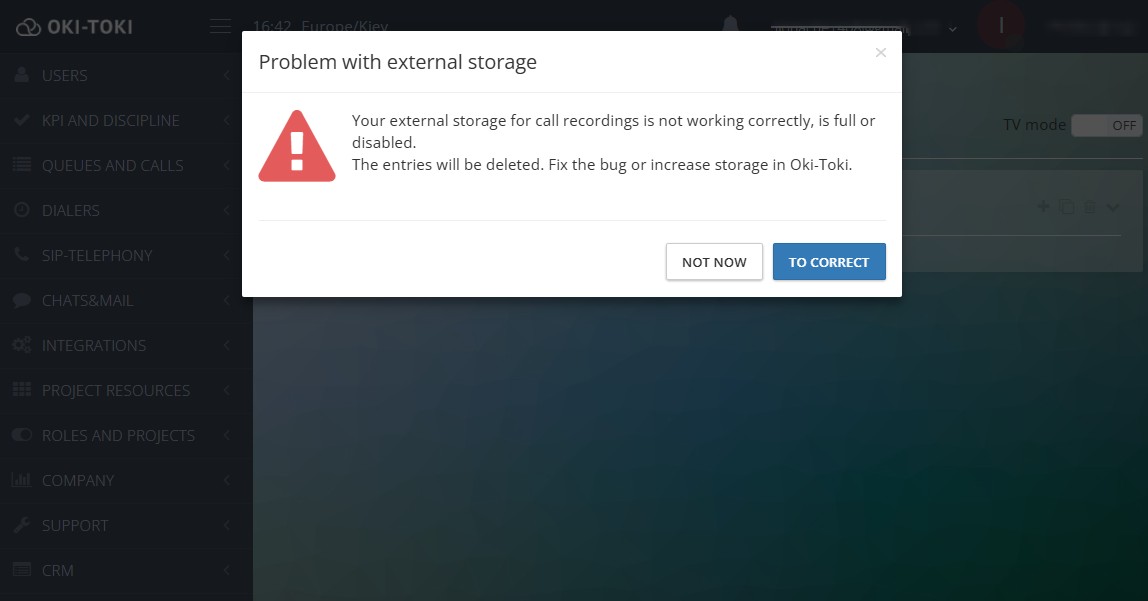
Here are some common problems and ways to solve them:
Dropbox connection error — what to do:
If you connected Dropbox and encountered an error – first check that you entered the data correctly (login and password). Make sure your profile is not blocked and has the necessary permissions for connection.
If everything is entered correctly – reconnect the service in Oki-Toki settings. Often, a simple deletion and reconnection helps.
How to fix the connection error with Google Drive:
- The first option – delete the integration in Oki-Toki and reconnect.
- If that doesn’t work – you need to reconnect by canceling all connections and granting access again.
To do this, open the settings of the Google account – the section “Third-party apps and services” and cancel all connections with Oki-Toki. Now you can connect the drive.
- When having problems with Google Drive also first check the data for authorization. Sometimes it requires updating the access token if it has expired.
- Also, check the profile settings and that you have access to the necessary disk and rights to write data.
If none of the above helped to establish connection with the external disk to Oki-Toki – you can contact technical support, and we will check what could be the problem. We hope our recommendations will help you choose the way to store call records of your call center.