Practically every call center sooner or later comes to the conclusion that it needs such a tool as “Blacklist of numbers” (BL) in order not to make and not to accept unwanted calls. Aside from the ability to create such a list, this should also be convenient. For this purpose, oki-toki has a tool called “Lists,” which can interact with incoming, outgoing calls and various scripts.
Creating a list
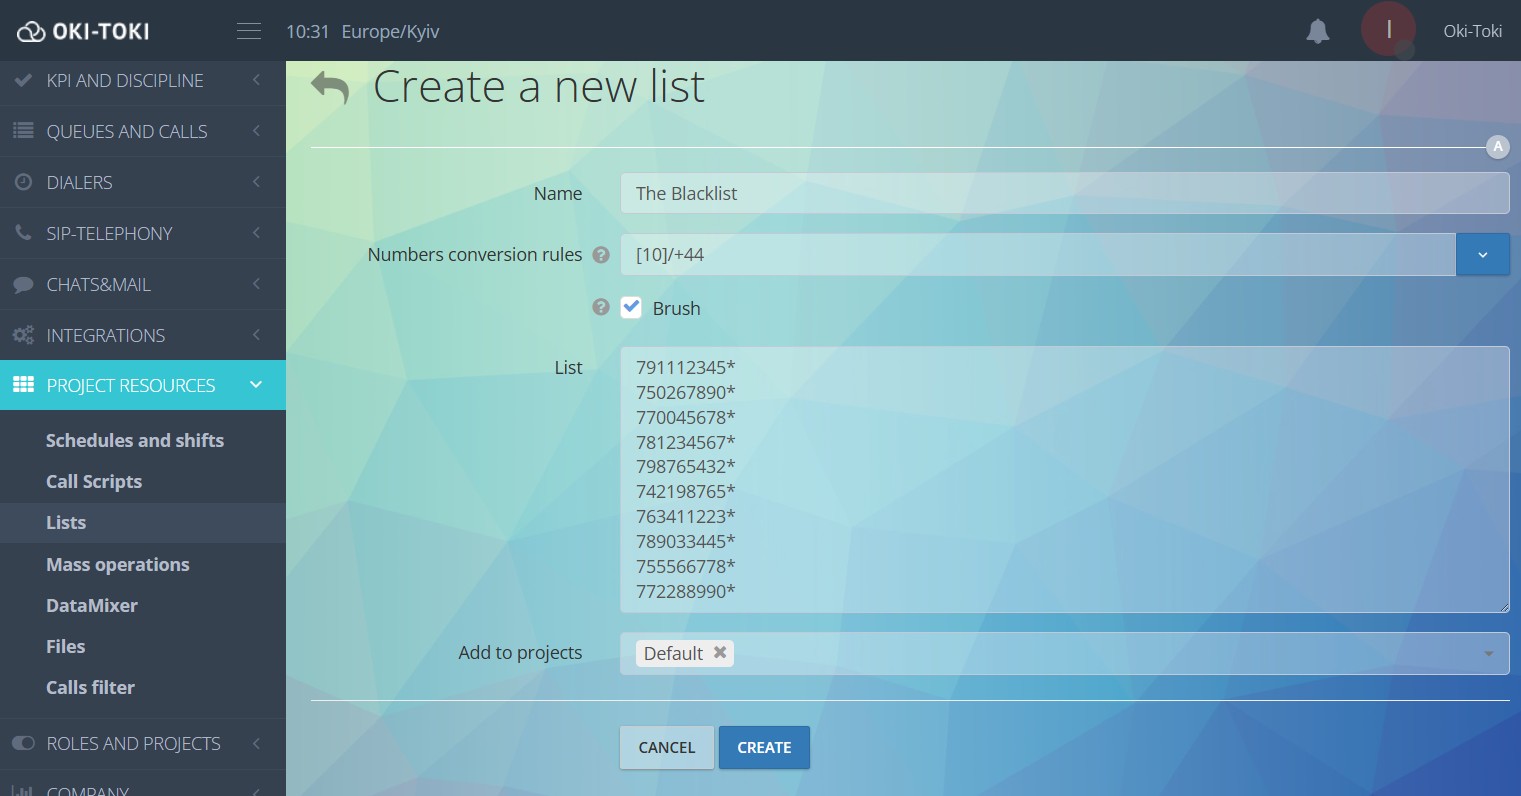
To create a “Blacklist of numbers” in oki-toki:
- Go to the “Project resources” menu, section “Lists“, click “Create”;
- Copy the numbers into the text field (one number per line, a column from Excel will suffice) and save.
Blocking inbound and outbound calls
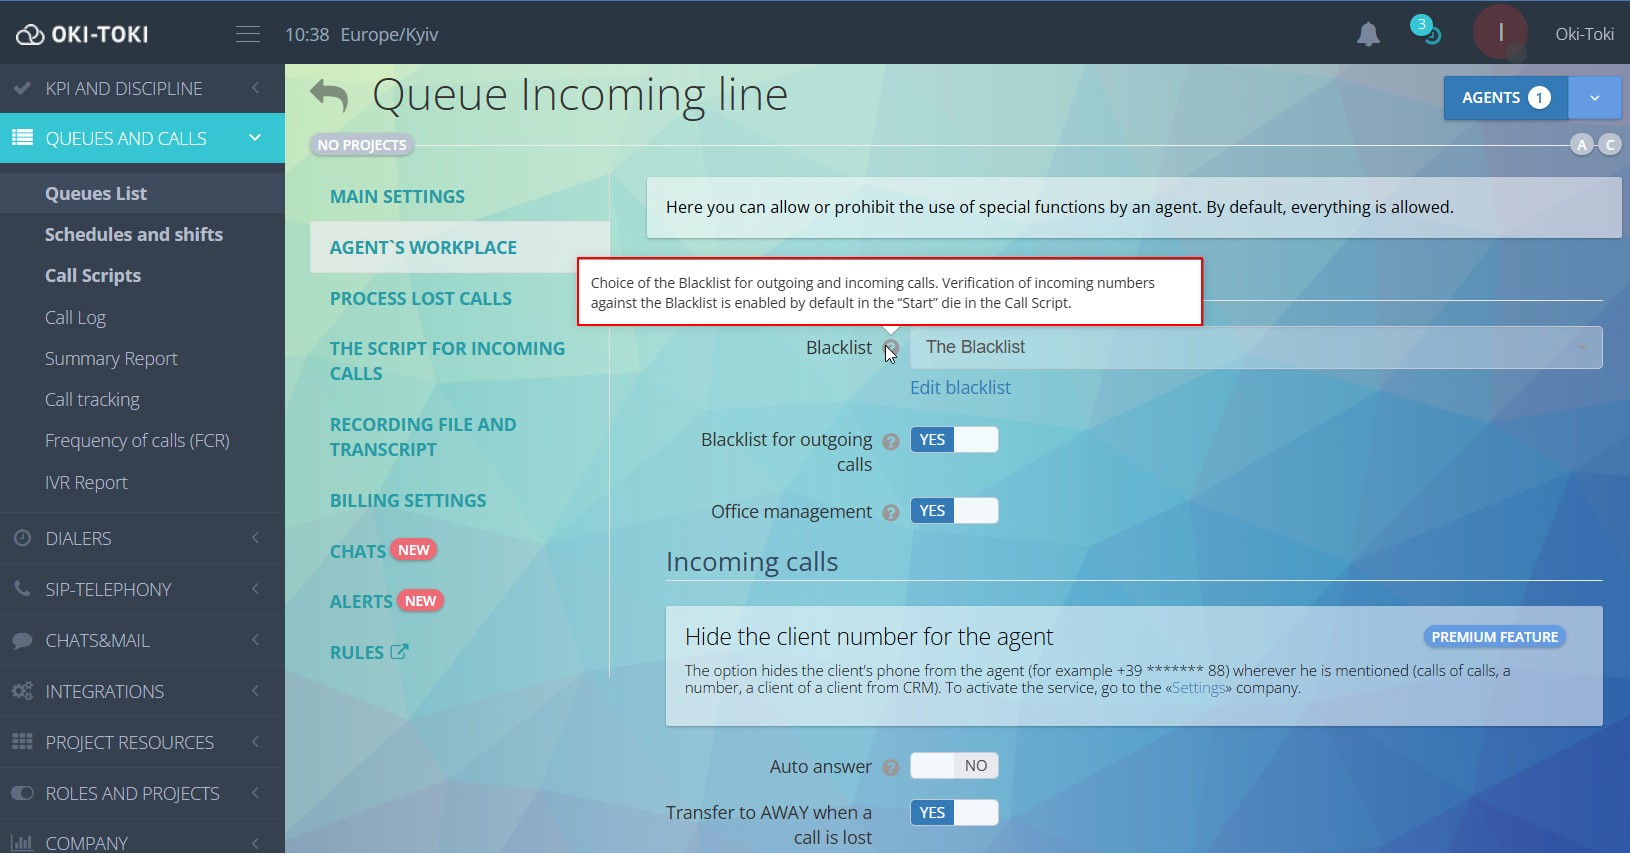
In the “Queue” settings, there is a “Blacklist” subsection for managing calls.
- Incoming calls – choose the list. The comparison of incoming numbers is by default enabled in the “Start” cube in “Call script”.
- Outgoing calls – activate restrictions for outgoing calls. When making a call, the system will compare the number with the list and will not allow calls to where they are not needed.
- Management at the agent’s station – if a client asks the agent not to call them anymore during a conversation, the agent can add the number to the block list from the call management menu. The main thing is not to forget to specify the needed list in the Queue settings.
Using for dialer
When importing hundreds or thousands of numbers, it’s easy to accidentally add a number that shouldn’t be called. To avoid manually checking the database, connect the Blacklist—the system will do everything automatically.
How to configure:
- Go to dialer, in which you need to restrict calls to certain numbers.
- Choose the list in settings and save the changes;
Important: The blacklist needs to be connected before importing numbers, as the check is performed during the database upload, not during the call.
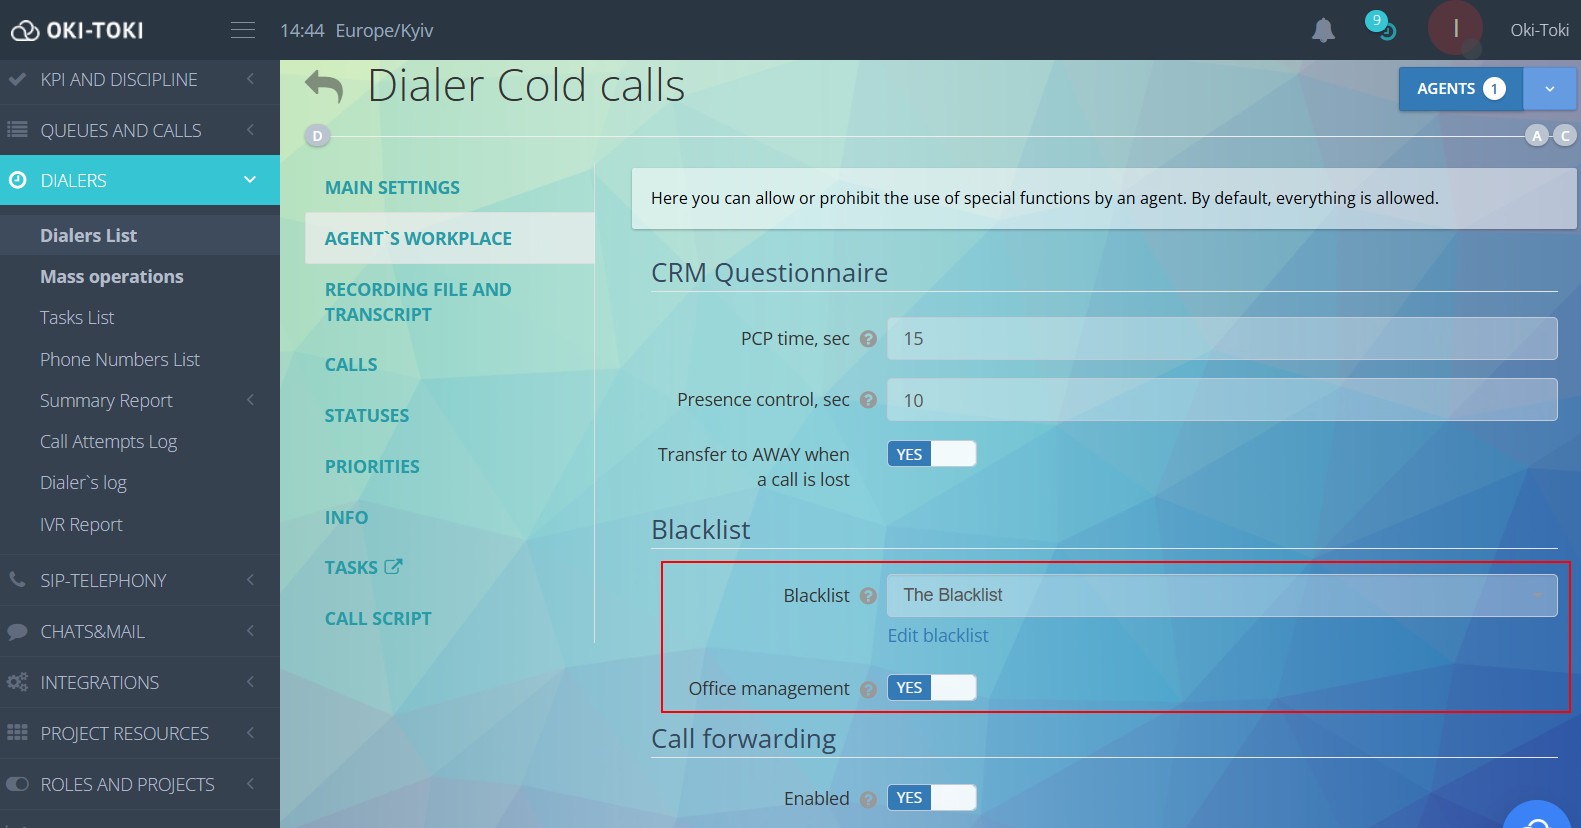
By activating management at the agent’s station, the agent will be allowed to block a number from the call management menu.
How to add a number to the Blacklist from the dialog script
This is needed so that the agent can add unwanted numbers to the BL from CRM form. For example, when selecting the response “Do not call anymore” in the form, the system will automatically apply the restriction to the client’s number.
How to configure:
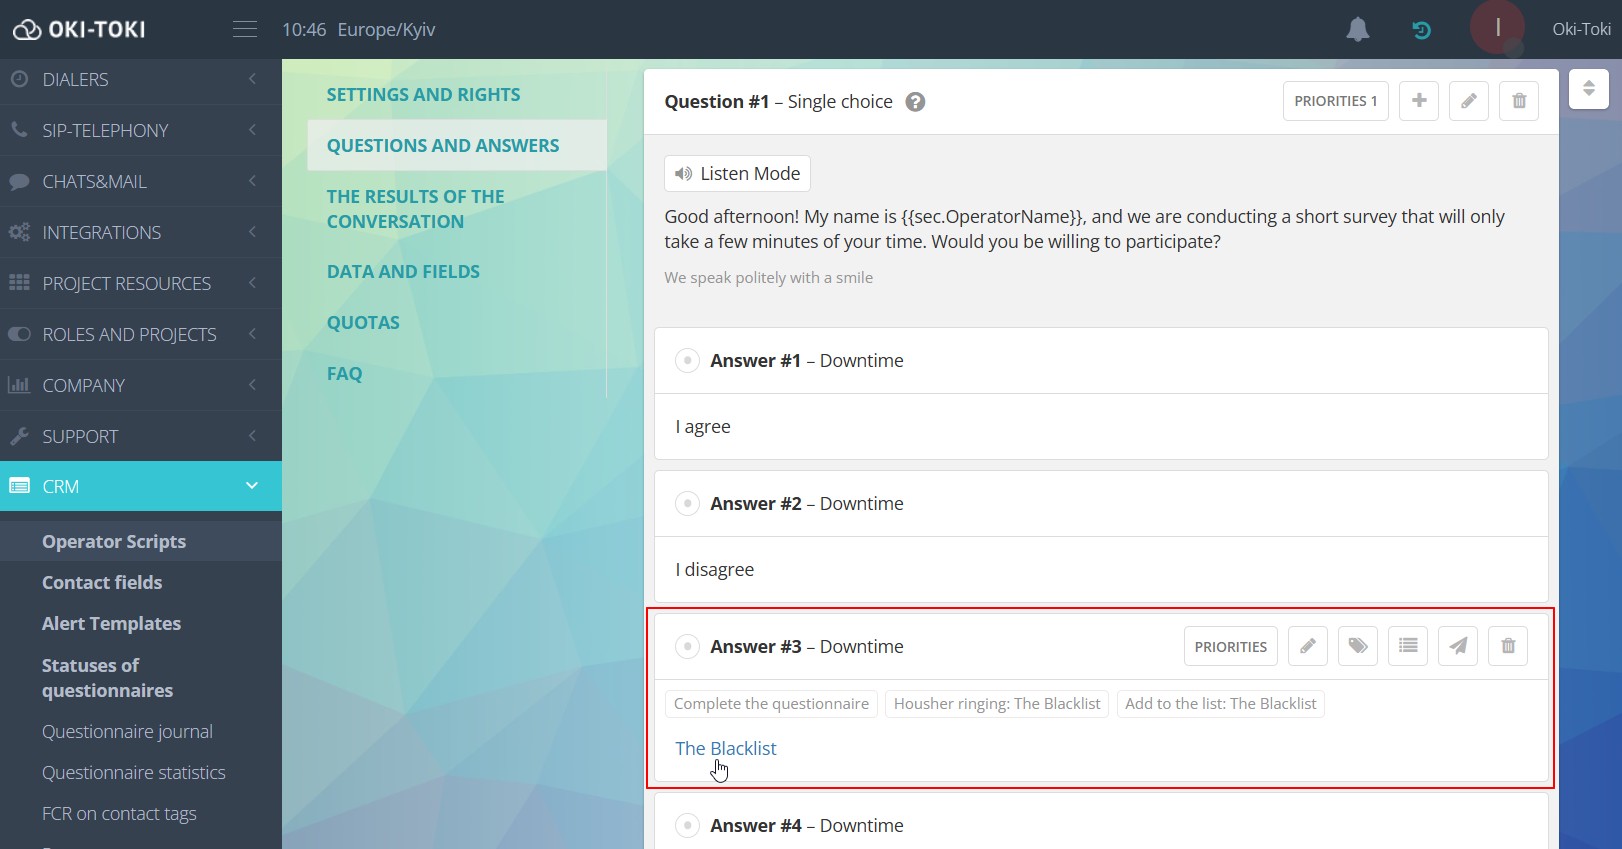
- Go to CRM → Agent’s scripts and select your script.
- Indicate the response option, for example, “Do not call this number anymore”.
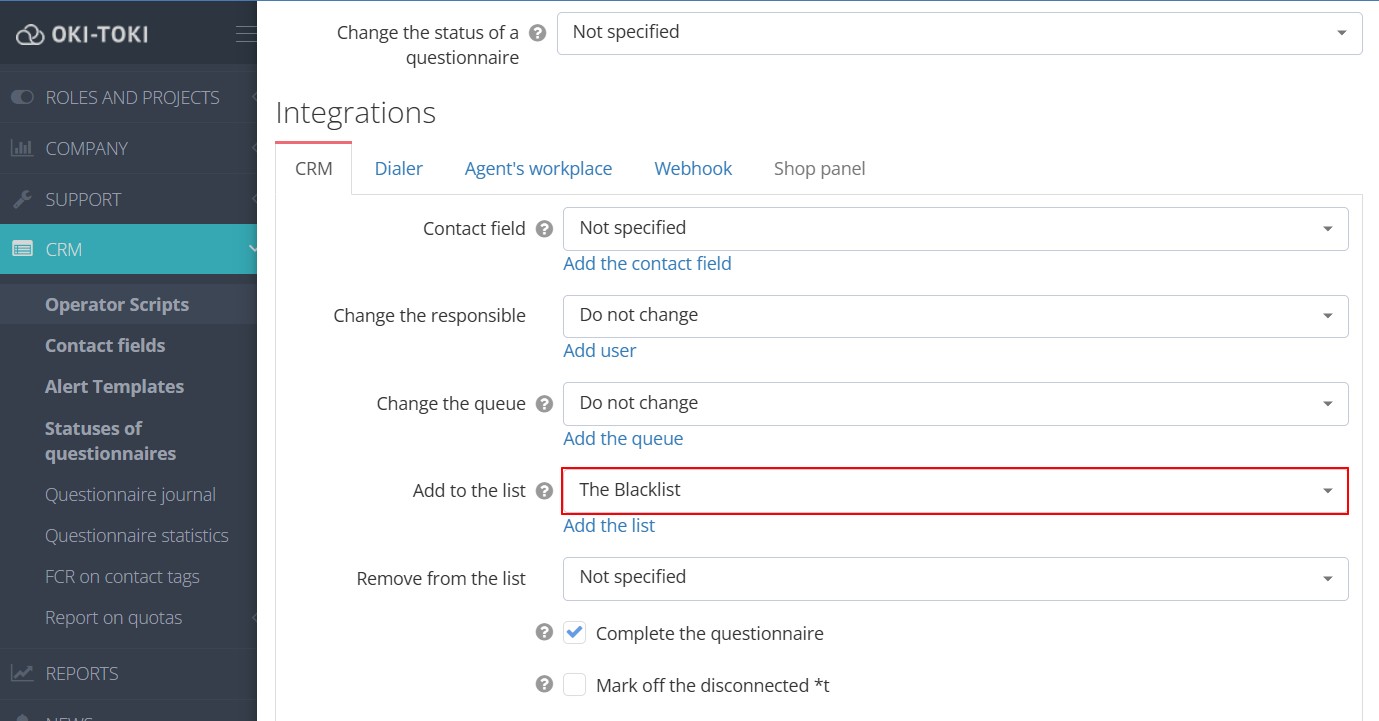
- In the “Integrations” section → “Add list” choose your “Blacklist”;
When the agent selects this answer, the number will automatically be added to the “BL”.
Format and number conversion
Add numbers for blocking in the international format, as they often come into the system in this form during an incoming call. There is a separate article on how to do this and about number formats.
If a subscriber’s number is hidden or it comes through a virtual SIP provider in a non-standard format, then the restrictions will not work.
And pay attention to prefixes. If the list includes the number 7700 456789, and the agent dials it with the prefix +44, then the call will be made to the number 44 7700 456789, and the check will not work.
Using different lists in the call script
Lists can be used not only for unwanted numbers but also for flexible call logic management. They help in handling calls differently based on the subscriber’s number.
In addition to the Blacklist, you can create, for example:
- VIP– list — for priority clients or VIP numbers;
- Service list — for internal numbers, partners, or customers;
- List of verified clients — to direct them through a separate script immediately;
- List of regions or branches — numbers linked to a specific region or office, conveniently routed.
In the call script, you can set up different handling schemes:
- routing calls from a specific list to another queue;
- playing different voice messages;
- transferring the call to a specific group of agents.
How to set this up:
- Create a list and add numbers to it;
- Open the call script and use the “Check number” block;
- Specify in the block the required list or values, for example, the number of characters, first digits, etc.;
- Set the call handling logic and save changes.
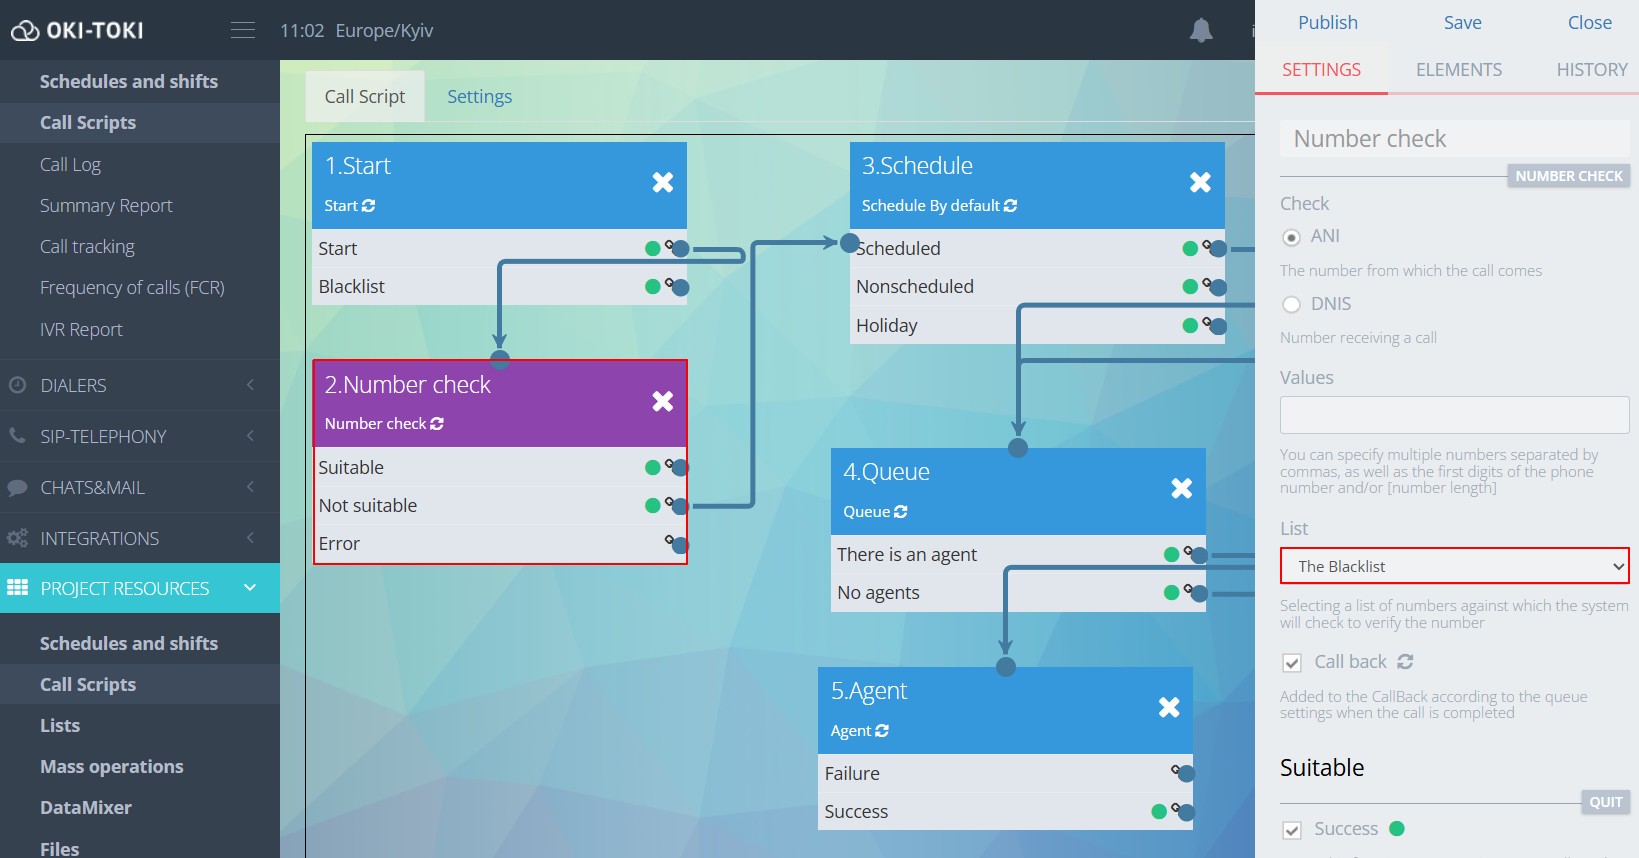
For Blacklist in the script, the settings will be the same:
- Through the “Elements” tab, add a “Check number” block;
- For incoming calls, choose the A-number and specify the list;
- The emerging unattached block should be connected between “Start” and “Queue,” so the system checks the number before it reaches the queue for agents.
- Publish the script for the settings to take effect.
All that remains is to bind the script to the incoming line: go to “Queue,” attach the call script to it, and save.
If you’ve set up everything correctly, then the incoming call will be processed by the “Check number” feature, which will compare the numbers with your list. If the number is in the list (“Matches”), then the call will be forcibly terminated.
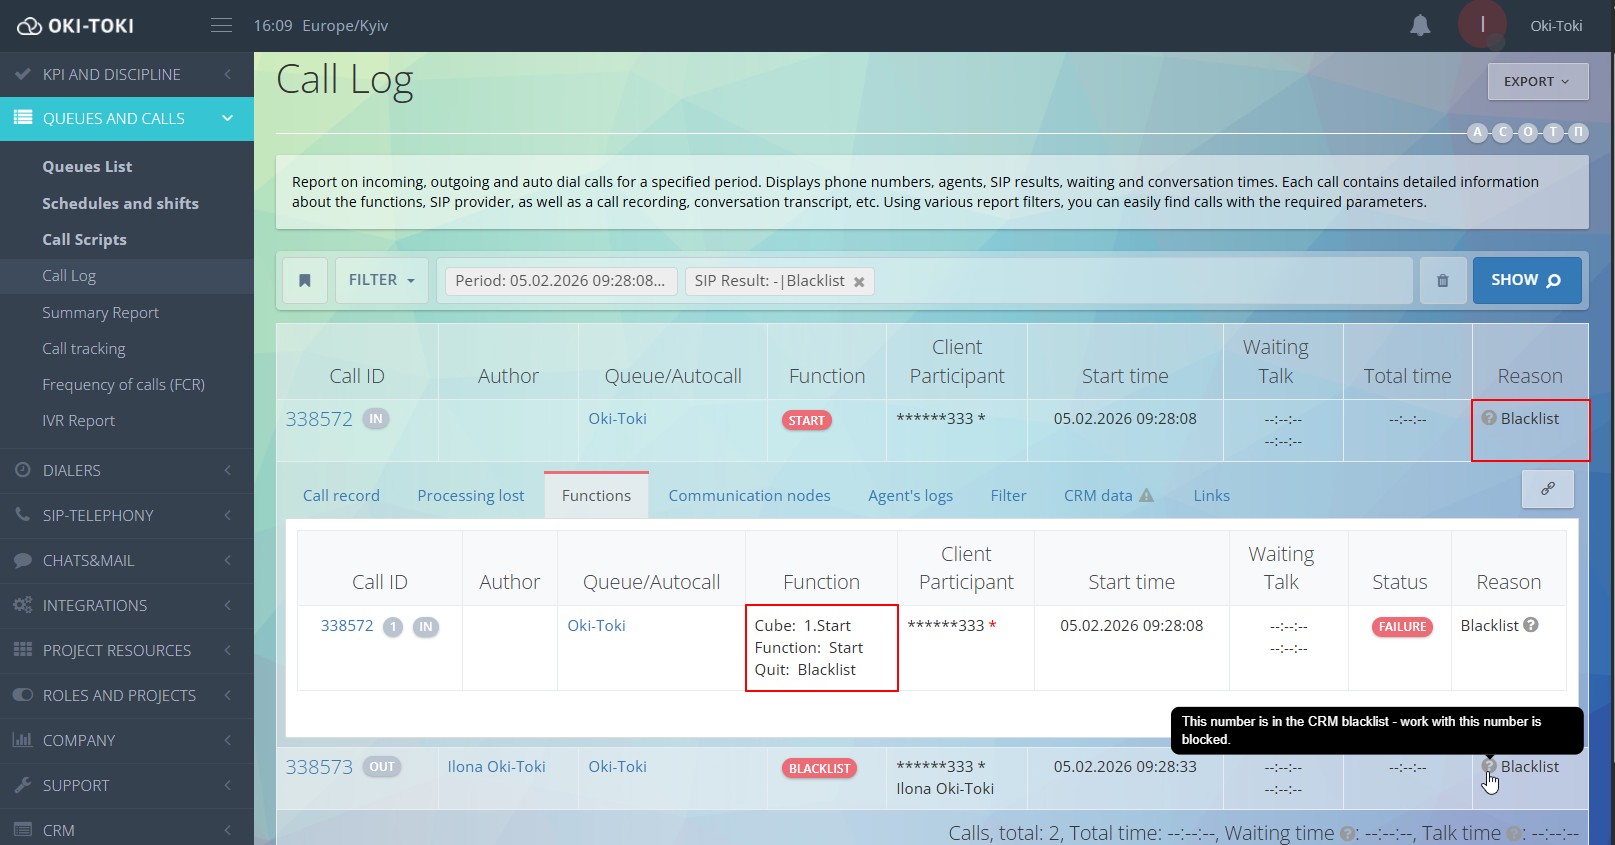
How to find calls by contacts that ended up in the Blacklist?
In the Call Log, using the “Functions” filter, select “Blacklist,” and the generated report will display attempts of outgoing calls to prohibited numbers. If incoming calls are also needed – select “Blacklist” in the “SIP Result” field.
In the Summary Report such calls are also displayed if the “Group by SIP call result” filter is enabled.
Additionally
- One list can be used in multiple projects;
- You can compile a report on incoming calls that come from numbers in the Blacklist;
- Manage lists through the API directly from the interface of your information system;
- If you need to receive a notification in Telegram or email when adding a number to the BL, use the “Events & Integrations” tool.