
Do you want to create a Hotline and ensure fast and high-quality customer service? In this article, we will tell you how to do it step by step in Oki-Toki. You will learn how to connect a SIP communication provider, create an inbound call script, and set up a queue for agents to receive calls, as well as what options you will need to make your call center a reliable tool for communicating with customers.
Connecting a SIP provider
The first step in organizing a Hotline in Oki-Toki is connecting a provider:
- To set up a communication operator, go to the “SIP-Telephony” “SIP-providers” section and click “Connect”;
- Enter the name of the SIP provider and save. The created SIP profile serves as a “folder” for SIP gateways that you will connect inside it. You can use these folders to route telephony across different projects without mixing SIP connections established for different business projects;
- To create a SIP gateway, you need to enter the SIP provider’s folder and click “Create”;
- The type “SIP-Client” is almost always used. If the SIP provider discusses a connection option where Oki-Toki exchanges IP addresses with them, then the type “SIP-Trunk” is used.
There is a separate article on the blog about connecting SIP-Trunk.
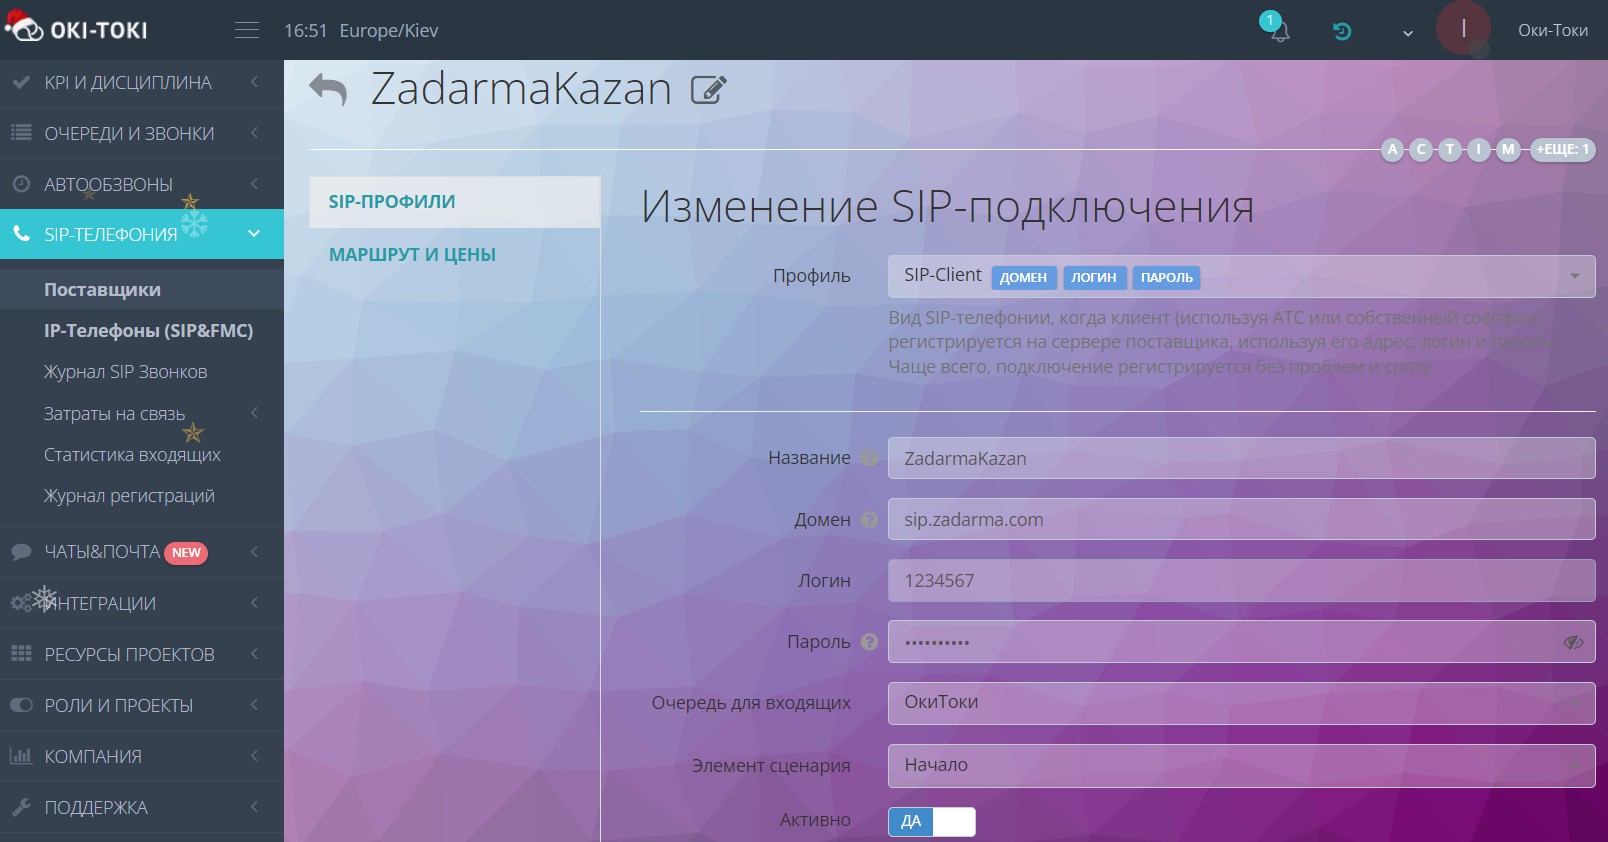
- Enter data from the SIP provider. For a SIP-Client, it is usually enough to input login, password, and domain. Additionally, you can specify the A-number, Realm, and port. The rest can be left to default settings;
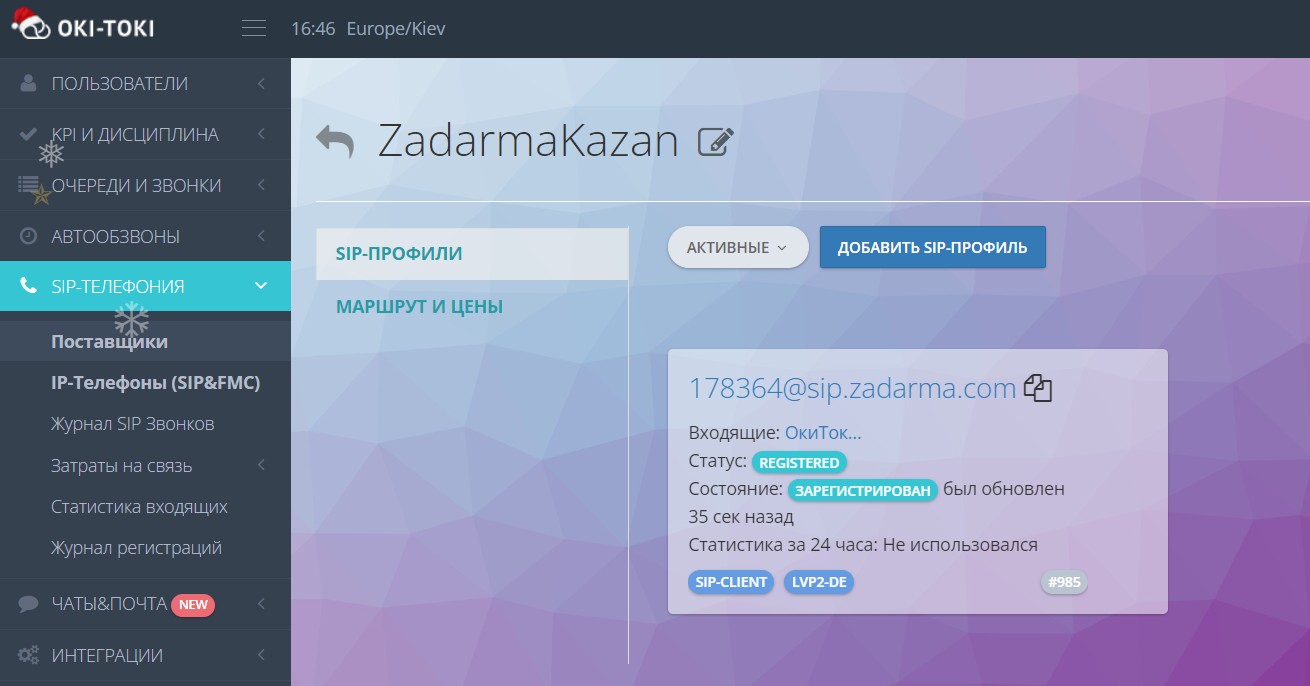
- As a result of successful connection, a REGISTERED status will appear, and in case of failed registration, an EXPIRED status will appear. If the status does not appear immediately, try refreshing the page after a few seconds, as the SIP provider does not always register the connection instantly.
- At the end of setting up the SIP provider, you need to specify which number prefixes (the first digits of the number) it can call (for example, Kazakhstan’s numbers start with “7”, Ukraine’s with “38”).
Creating a call script
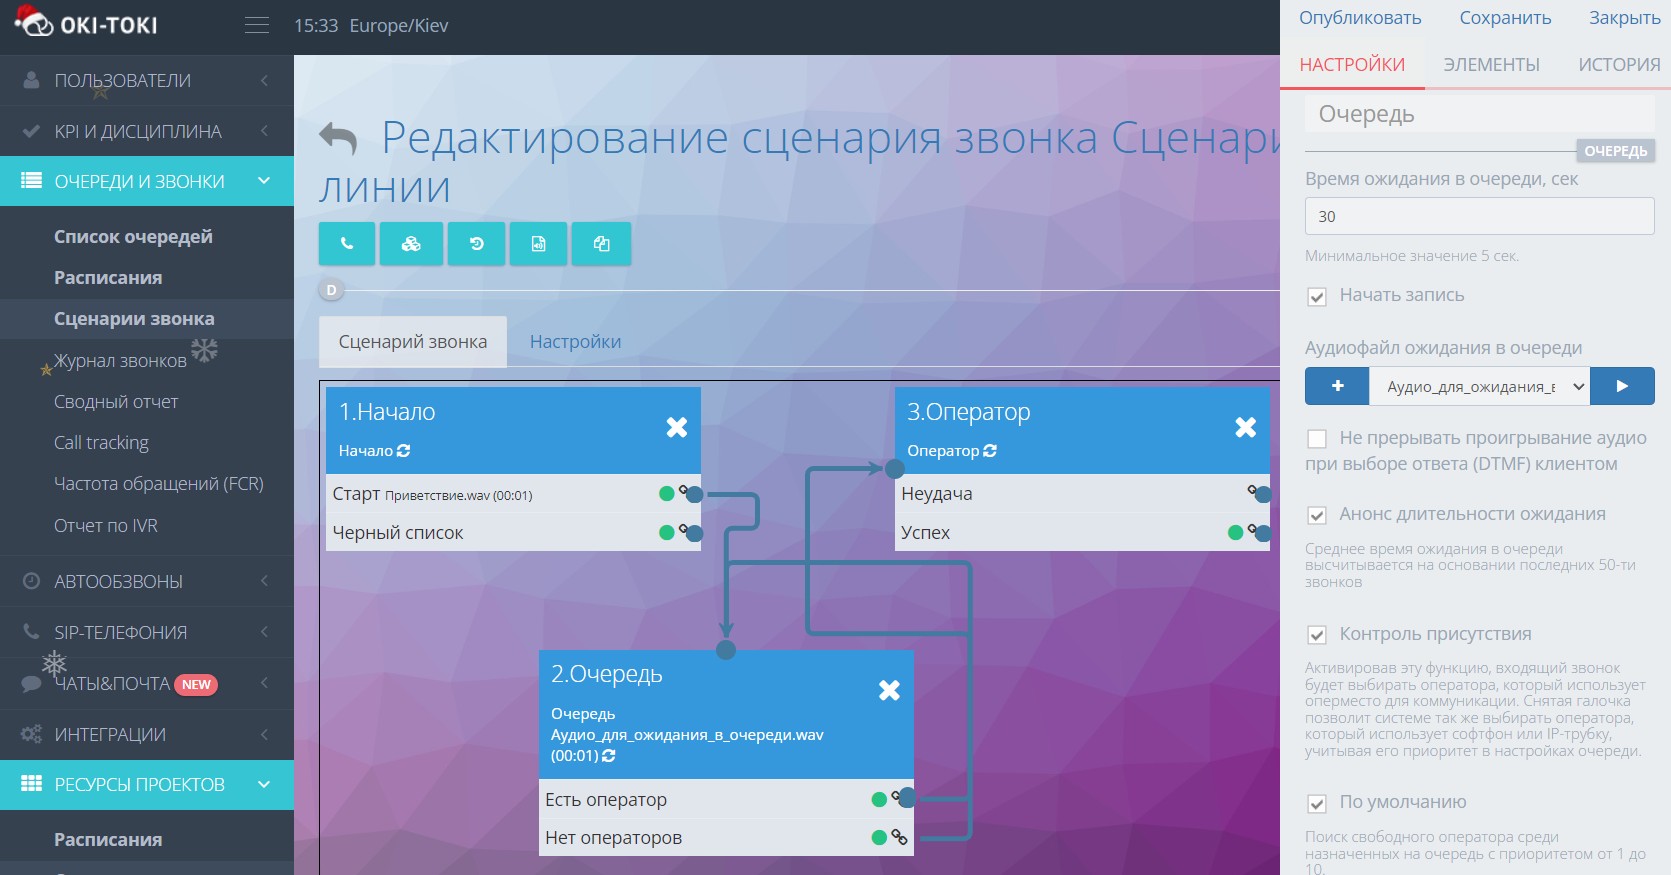
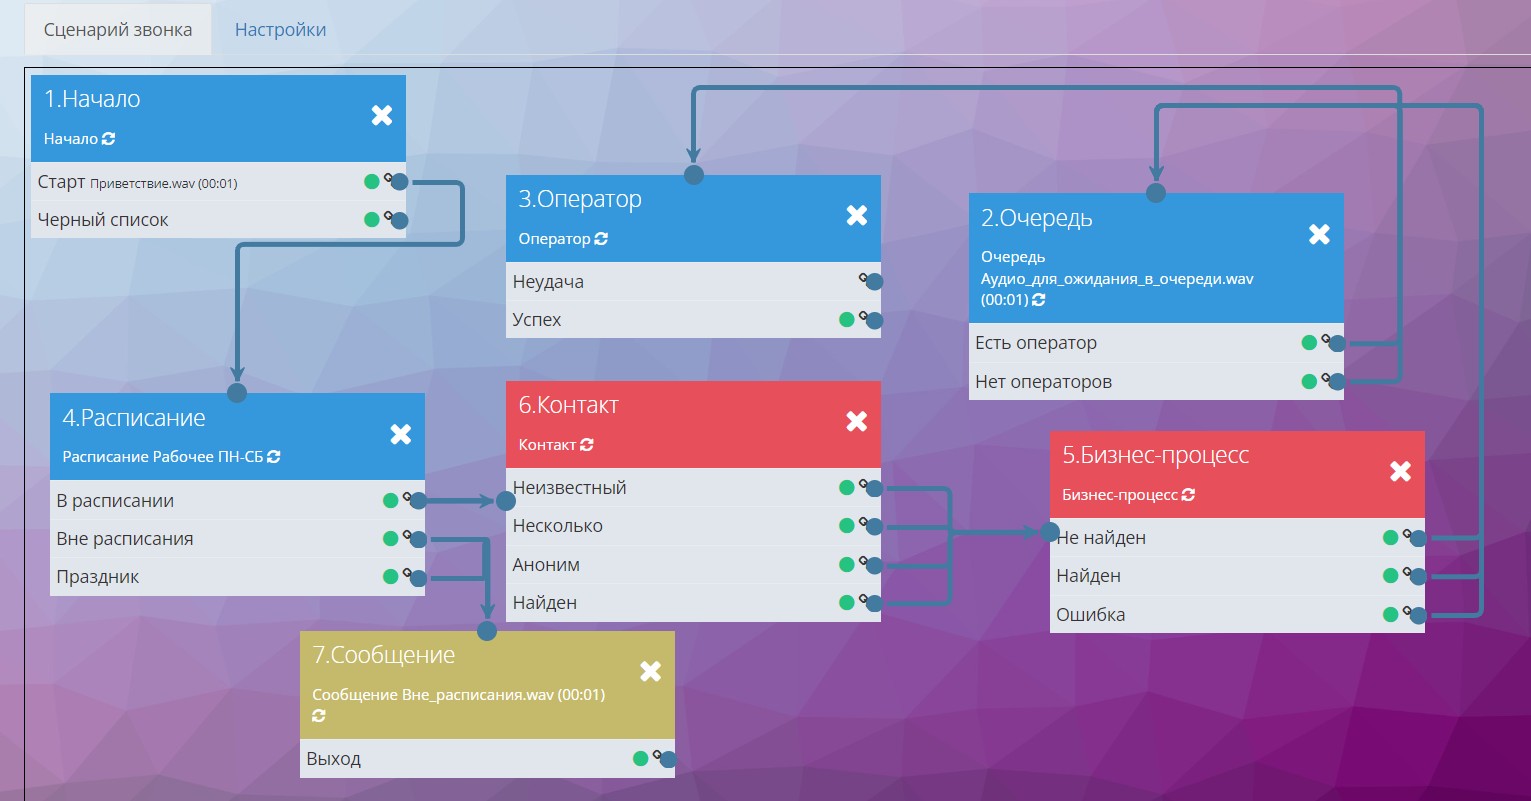
The call script is needed for inbound calls to specify the path the call will take. That is, it involves creating a scheme that will be followed when a customer reaches the line. The call script consists of several blocks (stages of the call).
Main blocks of the call script
- “Start” – this block usually begins the call. It plays a greeting file and activates call recording;
- “Queue” is responsible for distributing calls to available agents. Here, you can specify the time and audio for queue waiting, as well as an announcement of the connection duration with the agent;
- “Agent” – a block that routes the call to an agent.
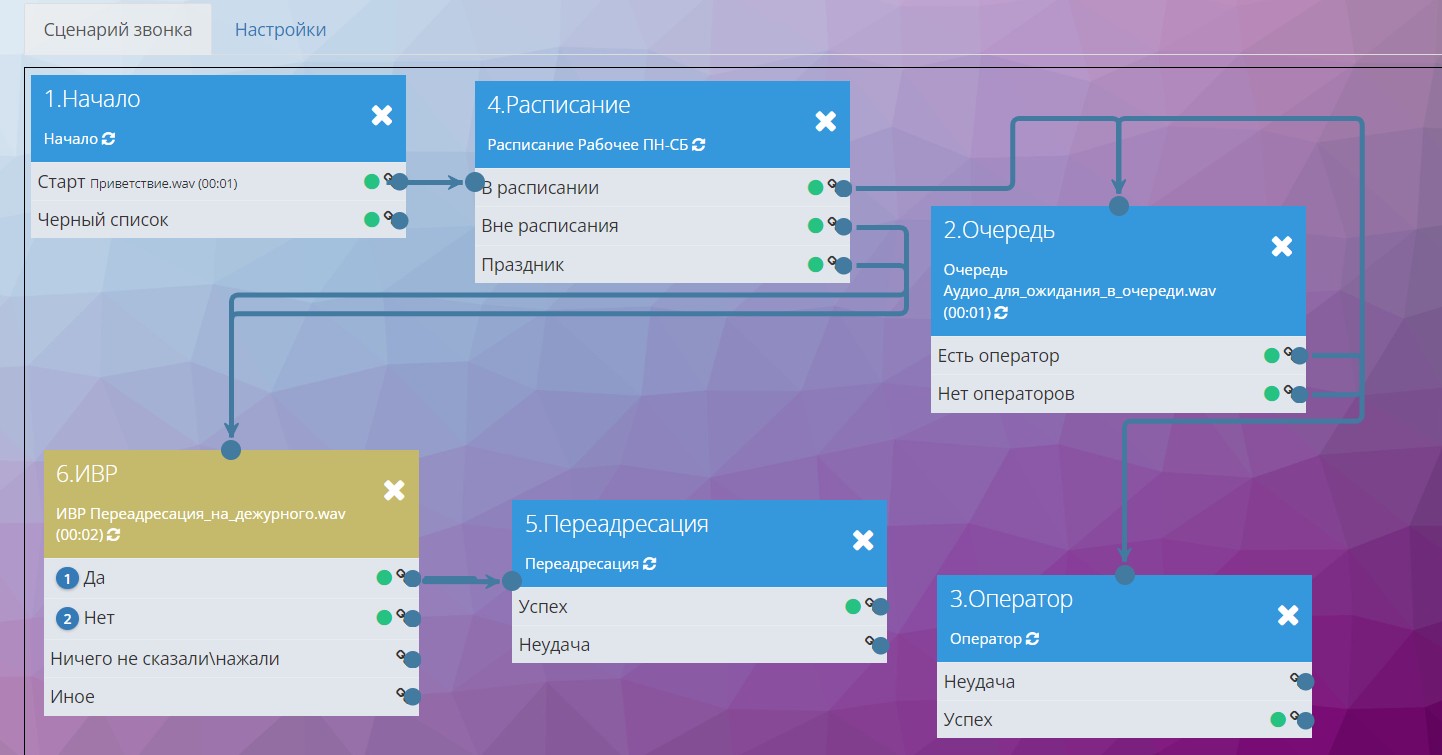
Additional blocks of the script
- “Schedule” – this block is responsible for distributing calls during working hours, non-working hours, and holidays;
- “Check Number” – compares the customer’s phone number against specified numbers. It can be used in business logic when working with Blacklist, VIP clients, etc;
- “Forwarding” – a block for redirecting a call to another queue, a specific agent, or a mobile number;
- “IVR” – with the help of Interactive Voice Response, you can build a dialogue chain, creating a primitive virtual agent. IVR will provide the customer with simple information and direct through the call script, recognizing voice response or DTMF pressing.
Blocks for working with Oki-Toki CRM
To work with forms in the script, you need to add the “Contact” and “Business Process” blocks:
- “Contact” – determining a contact in the CRM. A chain can be built depending on whether this is a new client, an anonymous one, or someone who has been conversed with before;
- “Business Process”– a block for choosing the dialogue script – a form that will open for the agent during the call.
Important! To work with forms, you need to create a dialogue script and attach it to the queue for inbound and outbound calls.
For more complex scripts, you can use additional blocks for playing or sending messages, retrieving data, as well as voice robots.
Creating a queue for inbound and outbound calls
The next step will be creating a queue for inbound and outbound calls.
- To do this, go to the “Queues and calls” — “Queue List” section and click “Create”;
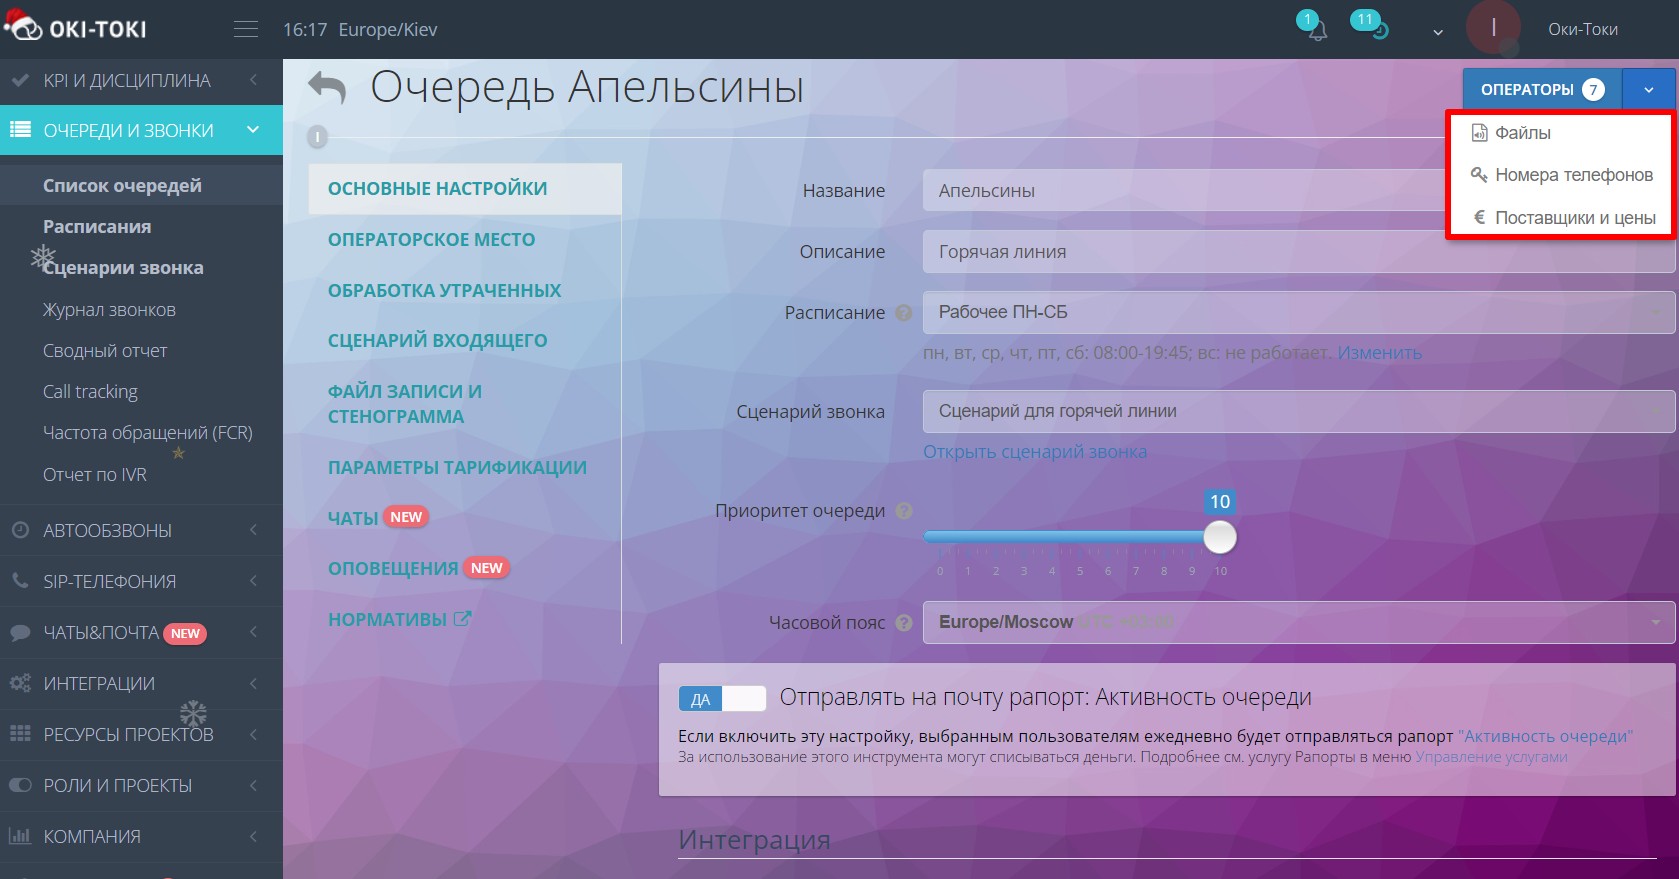
- Enter the name of the queue, select the previously created call script to be used on it, and save the setting;
- In the left panel, there are sections for setting up the agent’s position, missed calls, recording files, and transcripts, tariffication, chats and standards;
- For connecting inbound authorization (the number clients will call) you need to go to the settings in the upper right corner and select phone numbers, also choosing the previously created SIP provider and prefixes.
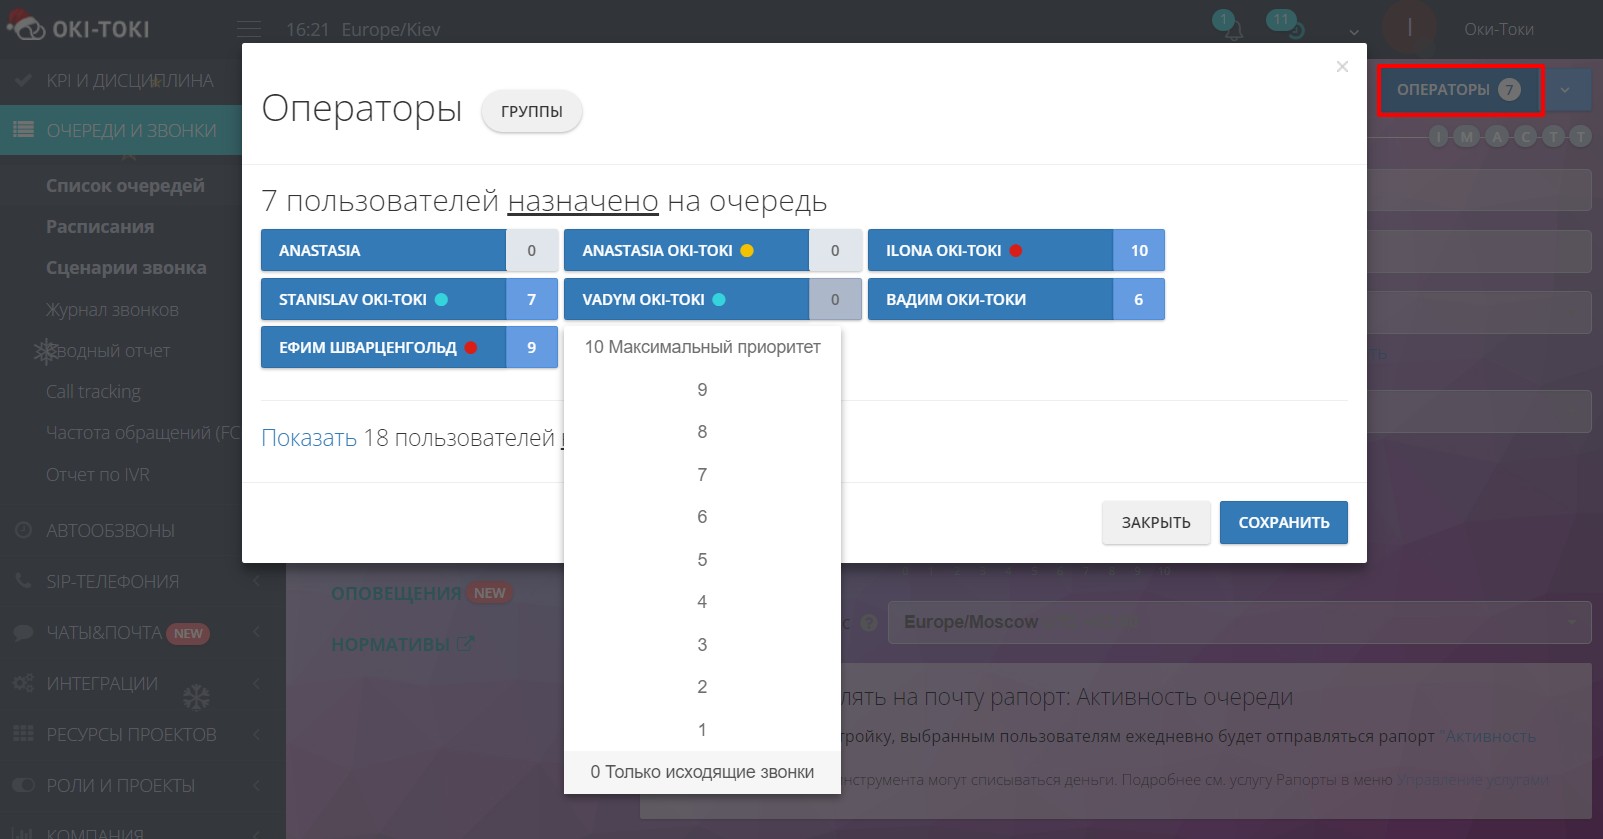
- To add agents to the queue, click on the “Agents” button in the top right corner and select the necessary employees. You can choose priorities, which will allow distributing the number of inbound calls depending on the agents’ skills: 10 – maximum priority, 0 – outbound calls only. Calls are distributed evenly among agents with the same priority (above zero);
Additional Premium features: determining the client’s timezone, sending a report on the queue’s operation, the ability to hide the client’s number from the agent, and priority for VIP clients.
Schedule for inbound calls
If the company does not accept inbound calls around the clock – you need to specify a schedule in the queue settings and add a block to the call script.
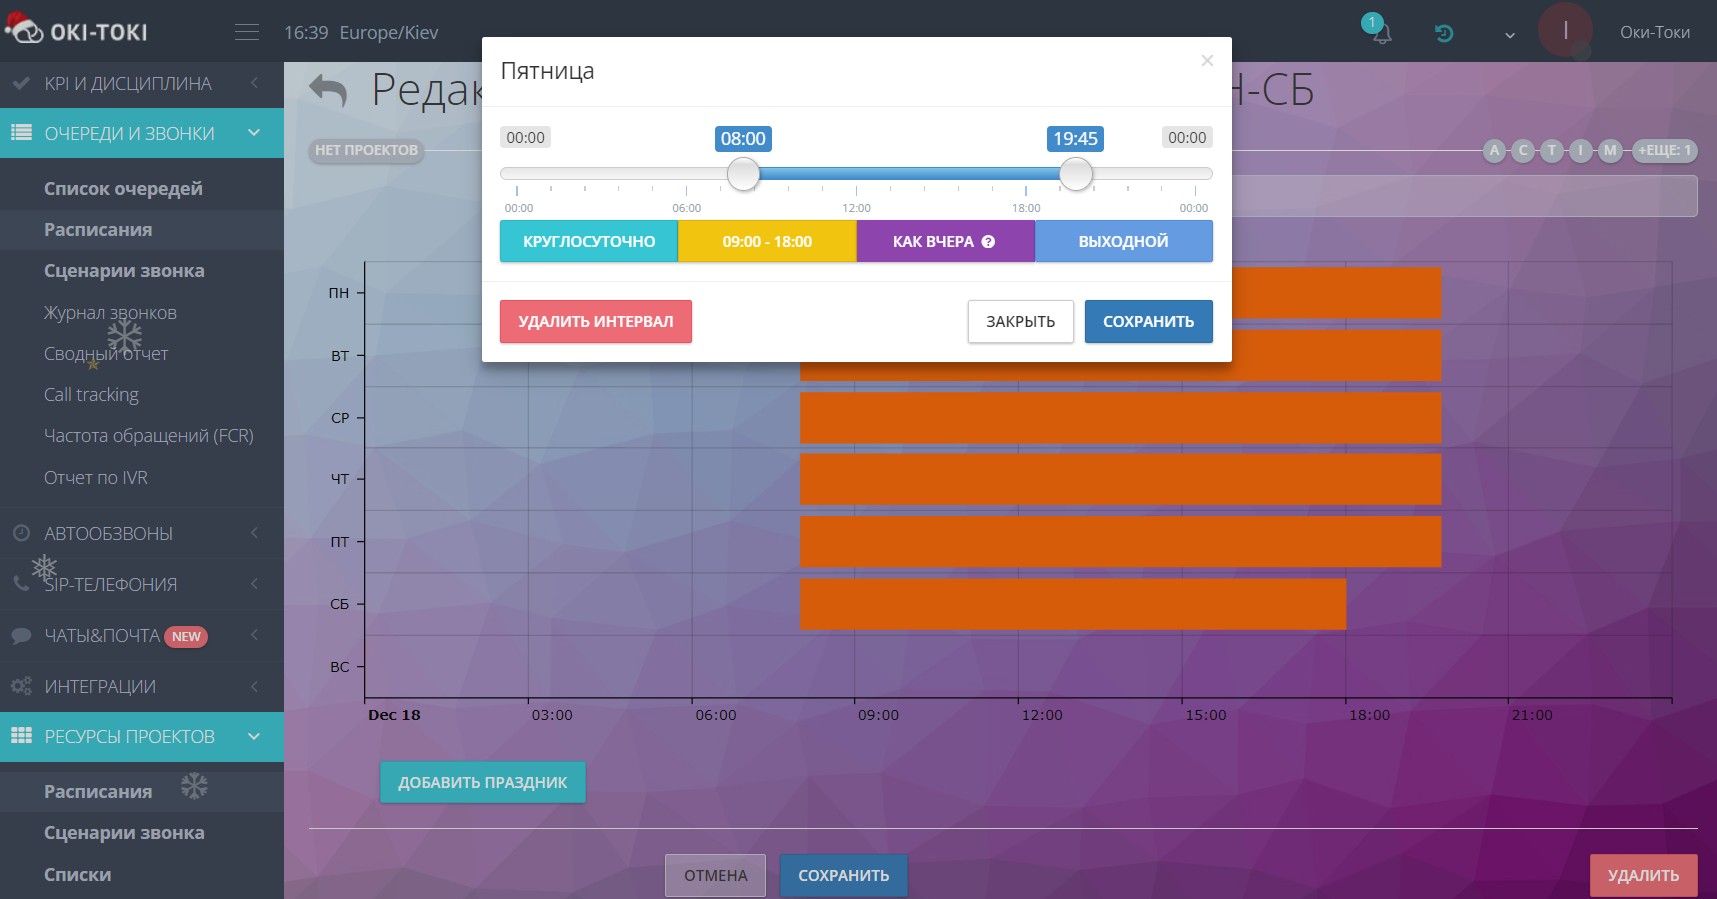
- To create a schedule, go to the “Project Resources” – “Schedule” section and click the “Create” button;
- Clicking on an empty field will display a slider, which you can use to adjust working hours. If the schedule does not change depending on the day of the week – you can use the “Same as Yesterday” button, so you won’t have to set the sliders each time. You can also add holidays to the schedule;
- After saving the settings, you need to return to the call script and attach the current schedule.
If you followed this instruction for connecting a Hotline in Oki-Toki, then everything should definitely work out! If some problems remain unresolved, and some questions unanswered – the support staff will certainly help you!